Project Process
Here I describe our entire process to create this NFT project. I'm hoping this will help others like me who want to create a project on their own. My dad added a "Dad Pro-Tip" section to describe in better details what a step is about. This might be more for an adult as he uses bigger words and it may be more technical. If you find any errors or confusing things, please contact us in discord so we can fix it!
Below is the outline showing the big steps. You can click any item in the outline to jump to that step or just scroll down and read the whole process. This "tutorial" is sort of a brain dump and is not super organized. This was pretty much written as we sat at the computer and walked through the whole process. It is more like a blog. We will revise this to make it more organized and streamlined in the future, so if you have any suggestions, or find anything confusing, please let us know in our discord so we can make sure it's helpful. It may help to read the entire thing once from start to finish. Then you can read it a second time and try to follow the steps and it will likely be easier. But feel free to give us suggestions to help us rewrite it as our project progresses.
- Planning Phase
- Naming the Project
- The NFT
- The Website
- Discord Server
- Marketing
Plan it All Out
First, we decided we should plan out what we needed to do and how we were going to do it. So we wrote out everything that we could think of that we needed to make. We came up with the following things...
- NFT
- the website
- the discord server
- how we were going to market it
- we also needed a name for the project
When we talked about it, we did not focus on the order of the items, just on the items that were needed. My dad said that it is more important during planning to figure out all the things first, and worry about order of doing them later. After getting the full list, then we put them in order. The order of the outline below is the final order we came up with.
This planning process is creating the "action items" for your project. These will be all the items you need to take action on or do something about. This "action" can include simply thinking about the item (and nothing besides just thinking about it)....or creating a "deliverable", which is just a fancy word for a physical resulting file or drawing or something you turn in (think of a deliverable like a piece of homework you have to turn in). This is basically a list of all the steps you will need to spend time on during the project. This allows you to have a general idea of all the work needed, so you can roughly judge how far along you are and how much work you still need to do. When coming up with this list, don't focus on the order of the items, just think of everything you can come up with that you think you'll need. Later you can re-order the items, or throw out (ignore) items that are part of another item. Also, don't spend forever trying to come up with a 100% complete list. You will not be able to get a full/complete list...you are just trying to get all the things you can think of now. You can always add items to this list later if you find out there is something you forgot or didn't know about (and there always will be).
What's in a Name?
Naming your project is very very important. Without a good name, nobody is going to want to talk about whatever you're trying to make. For example, Skittles. Skittles is a really good name because it's memorable and it's simple and something about it just makes sense. Like if skittles was named "rainbow candies" or something like that, would it really be as popular as skittles are? I mean there's a lot of candies that are called rainbow candy things and none of them turned out as popular as skittles. That is why naming your project something simple and catchy can change a lot and is really important. And names dont have to be super thought through when coming up with ideas because the name Meowsies came from my dad just giving it some stupid name when he was just joking around and the name kind of just stuck and sounded right so now it's the name of our project.
My dad says the best way to find a name is something called "brainstorming". This is where you just yell out everything that comes to mind and write it down no matter how dumb it sounds. Try this, and you will see it works great. Each time you say something dumb, you will laugh and then think of something similar but sounds good. This also works great if you have lots of people saying ideas.
My dad also said that we had to come up with multiple good names that we liked, not just one. When you make a website, you will use your name as the website name and that website name can sometimes be taken by someone else so you may have to use your second choice name. So we needed multiple names in case any of the ones we liked were already taken as a website name. Our first choice of name was Meowsies, but we found meowsies.com was already taken. But we found that Meowsies.xyz was not taken and we decided it was good and went with it.
Coming up with a name might occur after you have planned our more of your project, it may not be the first thing you do in this project process. So, if you are not yet finished determining exactly what you project is about, you might want to hold off on coming up with a name until your project is more defined. Creating the name is called "branding" and it is a crucial step in success of your project. You want a simple/catchy name that lets people easily know what your project is about. Just like the cover picture on a DVD, sometimes people only look at the picture and if the picture is confusing or boring, they will move on and not even bother to take a second look. This can also happen with your name, so make sure it is descriptive, but short, and easy to say and remember. It is also important the name is simple and easy to type as a website name. When deciding on the final name, you do need to double check the name is available as a website name (called a "domain name"). Domain names have 2 parts...the name and the TLD (top level domain). The TLD is the ".com" part of the domain name. This TLD portion of your domain name should also be considered when you are coming up with your final domain name. Originally, TLDs were supposed to reference your business type....
- .com - these were usually for a company
- .net - these were usually for larger networks of companies
- .org - these were usually for non profit companies
- .edu - these are mostly (if not always) restricted to actual education organizations (schools)
- .io - this is a newer TLD used for tech type companies (io stands for input/output in computer terms)
- .xyz - this is a newer TLD that is sort of just generic and no specific purpose so is a good alternative to .com , but may not currently be looked at as professional as a .com. But it is cheaper than .io and is being used more and more as a simple alternate to .com
The listing above is not complete...there are many many many TLD types out there. The best thing to do is to find a website hosting place you will use to host your website (example: godaddy) and then register your domain name there. When registering your domain name, you will be able to see what is avaiable on each of the TLD types. See further below in the Parts of a Website section for details on this.
Credential Management
Uh, what? Ok, i don't know what this means, but my dad said it is very important. He says "credentials" are your username and password. He says we need a special account for all parts of our project and to not use our personal email for anything. He says this is safer and better for making a real business type thing. He also says we need to make sure we do not lose our usernames and passwords because if we do, our whole project could fail. Just like if you lose your email password and you can never log into your email, you may get stuck and never be able to get back into it again.
Credentials are your usernames and passwords. When you make a project, you should create a special accounts for everything and not use personal accounts. This will ensure you can separate the project (work) from your personal (play) life. Just like creating a special area in your home to do homework helps ensure you do quality work, you should also create a special area (credentials) for your project. Even though you should enjoy your work in the project, you still want to ensure it is seperate from your play stuff. This will allow you to be more organized with your project and not forget or lose things. So, I suggest creating a new email address in your favorite email provider (we use google). This email address will be used as the primary email for when you need to sign up with accounts at different websites. Examples...we will need to create a twitter account, a discord server, and possibly a cloud file storage location for our NFT files. For each of these accounts, we will sign up using this new email address we created. That way if we get any important emails, they do not get lost in our personal email accounts that are likely full of spam.
Each time we create these accounts, we need to write down the login information (credentials) so we can easily find them if we need them. And so we don't forget what they are and get locked out of our accounts. When you make a project, you are responsible for that project and your community relies on you to ensure that project is successful (and doesn't fall apart due to a lost password), so you need to ensure you do not lose access to any of your accounts needed for the project.
Ensure these backups of your credentials (usernames/passwords) are stored and backed up in a safe location. We use an online/cloud backup solution, but if you don't have that, then you can also simply write down your credentials in a safe place. I suggest you have multiple locations if you are using backups written on paper in case one of them becomes unreadable or is ruined somehow. If you are going to create a project that will exist for long term, I suggest you purchase online storage backup from a reliable provider to ensure your backups are safe and not lost if your computer crashes, or your paper backups are ruined by something. As with any usernames/passwords, listen to Gandalf ...."Keep it secret, keep it safe"
Make Socials
Socials are things like twitter, discord, and facebook. We decided we would use twitter and discord for our project. We created new twitter and discord users using our new email address we created for this project. We recorded our username and password in our credential management so we would not lose them, but they are also linked to our project email address so we could use the forgot password if we lost access to these social accounts.
Twitter and discord are the 2 main places used by NFT projects currently. These should be the minimum social accounts you create. Other social media type accounts are fine, but ensure your main social media presence for an NFT project is through twitter and discord. You want to have a separation between work and play (or at least have the ability to separate when needed). You will occasionally need a break from your project where you just need to relax and not think about it. If you are using your personal twitter or discord accounts, this will be very difficult to take a break because you would need stay out of and not check those personal accounts to get away from the project.
Having separate accounts for business and personal is also much better from a security standpoint. In today's world, every time you get on the computer and interact, there is a risk of someone hacking you for some purpose. Using a "business" account for business activities and personal account for personal "daily web surfing" type activies allow you to limit your business account's exposure to these risks. You log into your business account, do your business, then log back into your personal account and do your daily surfing. Your personal account is at risk the majority of the time and your business account is limited to those certain times you are doing business related work. For some people this may not reduce their exposure (they may work more than they play), so this separation may not benefit those people as much in terms of security, but more security is always better.
You may be tempted to use your personal social media accounts for your project because you have followers or have a "presence", but I suggest you still make "business" type accounts. Your business account will be the owner and face of the project and should always show professionalism, class, and the utmost respect when posting/interacting with your community. If you use your personal account as the owner, someone could go back and dig up some sort of dirt in your history where you maybe weren't acting in a proper way. Even if you have nothing bad in your history, anything you say in the future will represent your project, so you need to ensure you always show these core values of respect. I suggest if you really want to use your personal accounts, you still create a "business" type account, but then use your personal accounts to promote the business. Your personal twitter can be the main marketing/influencer for your project. And your personal discord account can be set as the main administrator or moderator in your discord server. This will allow you to keep this separation if you ever decide you need it in the future. If you do this, you should still use the business twitter account (not your personal) to post the the announcement/update type tweets and use your personal one to promote it and get engagement.
What's an NFT?
All I understand is that an NFT is a non fungible token. This means they are each unique and not really like money...but more like trinkets or collectibles.
NFT is short for non-fungible token. The easiest way to describe them is to describe their opposite....a fungible token. A fungible token is something where all the tokens (coins) are worth the same. Just like a dollar bill or a quarter. (USD here). All dollar bills are worth $1...but some are ripped, some are dirty, some are clean. They are usually all different in a way, but they are worth the same. They are "fungible". A non-fungible token is where they are all not worth the same. Like in a PFP NFT...each one in the same collection is different and some of them are worth more than others. If we each have a BAYC (Bored Ape Yacht Club) NFT, they are both likely going to have a different value. They are both "tokens" under the covers of the blockchain, but not all BAYC tokens are worth the same. This makes them non-fungible tokens.
The main thing we need to know about NFTs in our quest for creating our project is that NFTs sort of have 2 main parts. They have metadata (which is stored in a plain text file), and an image file. Metadata is just data about the NFT. Examples of the data are....the name of NFT, a description of it, maybe trait values for the image represented by the NFT, and a location to that image file. For each NFT we create, we will create 2 files...the metadata file, and the image file. We'll see how those are created and how they relate to each other later in this process
PFP Project
NFT projects are mostly either artwork NFT or PFP NFT projects. Me and my dad had to decide if we wanted to make a PFP project or an artwork project. An artwork project is a project that is typically more complicated and detailed. A PFP project is more simple and ‘cute’.
Artwork projects are normally complicated pieces of artwork that are really cool and detailed and used more for looking at...similar to what you would have on your wall at home. PFP stands for profile picture and mostly used for people's profile pictures in social media and stuff like that.
We chose to make a pfp project because it was simpler and sounded much more fun to make for our first project.
PFP NFTs are very popular right now and are a great and simple way to get into NFTs and start to understand and get comfortable with them. And they are very useful and fun. They are also great ice breakers for social media. People use them just like you would use a t-shirt at a social gathering. You could wear a t-shirt of your favorite band, or your favorite video game, or anything you find interesting and people at the gathering who knew what it was or were attracted to it are more likely to stop by and chat with you. It gives people a way to know something about you (or your interests) with a quick glance. They are usually much more playful and fun than your standard artwork style NFT, so they are a better choice for getting kids familiar with NFTs
How to Stand Out
We needed to figure out what would make this project unique because there are so many different PFP NFTs out there already. We needed something that was unique to only this project. We came up with an idea that I could redraw everything for the NFT in 6 months, then again in 6 more months and somehow show or give those new drawings to everyone for free who had one of my NFTs. That way everyone that got a NFT could see my art progress over a year. I think the new drawings will be the same subject matter but in a new style or better quality based on my progress as an artist. So it will be like your Meowsie NFT grows up with me.
Another thing we came up with was that I would write a detailed explanation on how to do everything in the project so kids like me could figure out how to do it. Especially if they didnt have a mom or dad that knows how to code like my dad does. With our instructions, they could just copy our code and learn from our steps.
So our final decision was to have both ideas be what makes us unique. When you get one of my NFTs you will be getting more than just the one NFT, you will get to see me progress in the additional drawings that will come. You will also be helping us to help others by documenting and helping other kids who come to our discord for ideas and help.
Finding something unique is pretty important because to have a successful NFT you either need to be lucky or you need to have something that makes people choose your NFT instead of choosing from the other 10,000 out there. You should probably spend some time thinking about how to stand out because if you skip this step, there's not a very big chance that people will see your NFT. Im really glad me and my dad decided to make part of this project be documenting the instructions so that i can help other kids learn how to make NFTs if they dont know how. I also really like how im going to redraw everything for the future NFTs because i also want to see how much my art is going to improve in a year.
The PFP market is flooded with projects. You can find anything from a dinosaur, to a mouse, to an invisible person, or a line drawing of someone staring at a computer. For people to find you in the crowd, it helps to have something unique, or special about your project. It also helps to have some sort of purpose or "utility" (aka "use-case") for your project (like membership to a club, or a chatroom where people talk about the same subject), but just being a cute or fun image is also a perfectly acceptable purpose.
Generative Art
A PFP project is normally ‘generative art’ which is art that has been made with a computer or program using art or layers of art that you have created yourself.
To make a generative art PFP, you need a ton of different layers so that the computer program could layer them on top of each other in different orders to make different pictures. I drew each layer myself then had a computer program put them together to make the final image. Generative art is also sometimes called coding art because you have to write code and run a program to make it.
The way the program creates the final picture is by choosing one of each type of layer and adding them all together to make the final pictuare. Each "type" of layer is called a trait. Examples of traits for an NFT would be like different hats, fur color, eyes and other stuff. The program will randomly choose one of each of these trait types to make a final picture.
For our project we decided to make a cute little cat that would have different accessories and different colored fur.
Generative art is art where the artist writes certain "rules" that a computer program will use to generate the final work of art. Sometimes artists will create no art at all, but let the computer program completely generate the art using a set of rules that are defined by the artist. An example would be if you wrote rules like "Every hour, create a circle in a random place on the canvas. The circle color would depend on the temperature in your town at that time. The size of the circle would depend on the wind speed at that time". In this way, the artist simply creates the rules and lets the computer generate all the art.
Another method of generative art is where you start with something more recognizable, like an animal, or an object. Then you let a computer choose how to change that basic figure in different ways. An example would be where you create a base layer for the subject...a naked squirrel for example. Then create different colors for the fur on the squirrel. Then create different hats for the squirrel. Then create different objects the squirrel can be holding. Then you have the computer program start with the base layer and then randomly choose the additional layers to put on top. In this way, the layers are applied without your preferences affecting they way they are put together. It creates combinations that you would never have chosen yourself...sometimes they look terrible, sometimes they look great.
This 2nd method of generative art is perfect for a PFP project. You as the artist may not necessarily like a blue hat on green fur with the squirrel holding a toothbrush....but there is possibly someone out in the world that loves that combination and thinks it is perfect. The computer generates the art with no bias as to which layers go better with other layers, so the resulting artwork is better suited to be attractive to a larger audience...pretty much everyone will be able to find at least one piece in your collection that they like, or are interested in. Similar to the t-shirt idea I referenced earlier, it allows people to choose images that have attributes that they like so when they use it as a PFP, people will have an idea of what you are interested in. Just like the t-shirt story I used earlier...you can choose the image that has the items/accessories that you like and other people who choose images with those same items/accessories will sort of all think of each other in the same club and it's all part of that ice-breaker that gets people together.
For our project, we will use this method of generative art. We will create a base layer of a cute little cat. Then create different colors of fur, and different accessories that can be on the cat. Each of these differences are known as "traits". Just like your hair or eye color is a trait, these differences are known as "traits" in an NFT.
For generative art, you often also want to decide how many pieces of art you will generate. This is often referred to as the "collection size". It is the number of items you have in your generated collection of images. You can change this value later, but for now, we think we will want 1000 total images, so our collection size of our NFT will be 1000.
Traits
We needed to make different traits for our cat so the computer program could create different images. This is the list of traits we decided on...
- Background - this is the background for the cat so it is not just sitting in white space
- Claws
- Earrings
- Eyes
- Face accessories (things like blush or freckles)
- Fur Color
- Hats
- Mouth Accessories (thing in the mouth like a lollipop or a mouse)
- Neck Accessories (necklaces)
- Whiskers
For this step, it may be good to "brainstorm" again. Just come up with all sorts of traits and wait until the end to decide which ones you should actually keep and which ones to get rid of. Think of traits that will be interesting to the widest group of people. Or think of traits that are related to your project utility? Once you have your list of possible traits, go through them to remove anything that you don't think would work well. Try to keep traits that will have a good variety and will not be too complex. Remember your PFP image will be fairly small when used as a profile picture by people, so a super tiny item that is complex, may not show up great. If you aren't sure about if a trait will look good or not, you can always wait until you start drawing the individual traits to decide. Sometimes you don't know until you see it to know if it will be good or not. You may want to keep your number of traits limited at first just to make sure you aren't making things too complex. Each trait will have multiple final values (like a "Hat" trait may have 8 or 9 types of hats that you will need to draw).
Creating the Art
The next step is the actual artwork. This means making a ton of layers for each trait type. I used "ibis Paint X" to make my art. This is a free app that can be put on a chromebook and you can create layers. One thing to watch out for is having too many folders or layers. The app would crash with too many layers and it may be unable to open it and you will lose all your work. I learned that i could make the basic outline of my cat as a layer and save that file with just the one layer. Then duplicate that file and only add each trait type to each file instead of all traits in a single file. This seemed to work. So i would create a new layer for each trait. An example would be for hats. I decided to make 10 different hats. So i opened my hat trait file and made 10 different layers so there was one hat per layer. I positioned the hat on the cat outline layer so it would line up correctly when the program layered the hats onto the final image. I repeated this process for each of my trait types. The art work was the most fun part and i enjoyed doing it a lot.
First you will want to decide how big the final art will be. This site has a lot of info that may help you decide based on your application (or "use-case"/purpose of your NFT). We decided on 1333px x 1333px for our canvas size because it was slightly larger than the size recommended by instagram (which had the largest size of the social media platforms). We also decided to use .png as the file type because we need a transparency layer (which .jpg won't allow) and we want the best quality when the display device resizes the image. PNG seemed the best choice for quality (and since we have few colors, it will still be relatively small file size). You may need to experiment with samples of what your final image will look like when brought into social media platforms to get an idea of what happens when resized, and how they crop your image on import, etc.
When creating the base layer for our cat, we also chose to leave empty space around the cat that is slightly larger than you would think you should have. We did this, because we found that a few social media apps will crop your image into a circle. If your final image takes up the entire canvas, then when the platform crops it into a circle, you will lose a lot of the outer edges. Again, play with this when deciding your image placement on your canvas.
Once you have decided on the canvas size, you can create your background layer. Create your first background layer as pure white. Background layers are the only layer type that will be 100% non-transparent (they are the very bottom layer of every image). Then create a new layer on top of that for the "subject base layer". This will be the first layer you will place down in your image before placing "accessories" like eyes, mouth, clothes. For an animal type project, this base layer would be a "Fur" layer. Everything except for the actual fur in this layer should be transparent. This will allow you to create additional background layers that are different and not just just plain white. Once you have your white background layer and your "subject base layer", then save a copy of this file separately as a "source file" in case you need to create additional files during this process. This will allow you to use this "source file" as a template that has the correct dimensions and layout of the base layer so any additional layers you made in these extra files will line up correctly.
Once you have that "source file" saved off seperately, you can then get to work. When using Ibis Paint X, we ran into a lot of memory problems when we had 20 or more layers, so we decided to create a file for each trait type and only have that trait in the file. This kept the number of layers per file to under 20. We made a copy of our "source file" for each trait. So we had a "backgrounds" file, a "hats" file, a "claws" file, etc. In each of these files, there was a white background layer, the "subject base layer", and then layers for the trait in question.
It may be worth noting that you do not absolutely have to have every layer's canvas size the exact same size if you are going to be doing advanced image generation where you re-position or re-size the layers when applying them on top of each other. Because that type of process is complex and time consuming, we are going to do the most basic image generation and apply layers over each other with no re-sizing or re-positioning. So, all of our layers are identical canvas size.
Now that we have a file for each of our trait types (or a single file if you have software that can handle many layers) we can begin work on each of the traits. Make the background layer and the "subject base layer" visible. Then activate one of blank layers so we can draw on it. "Activating" a layer may be different in your software, but in Ibis Paint X, you simply click on the layer so it was highlighted. Then draw your trait items. As an example for hats, we would draw a "baseball cap" in the correct position on the canvas (so it looked like it was on the cat's head). We would then rename this layer to the trait type with a sequential number. Example: "Hat1". The number in the layer name will be used by our image generation software to select one of the numbered layers for each trait type using a random number generator (meaning it will choose one of the Hat1 through Hat10 images to place onto the final image). Once that is complete, we can move on to the next instance of this trait. First, we would set the "baseball cap" layer to be non-visible and then chooose the next blank layer and make it visible and activate it. Then draw our next hat on that layer. Then rename the layer to "Hat2". Then repeat this process...
- set the layer you just completed to be non-visible
- set the next empty layer to be visible
- activate that layer
- draw your next instance of the trait in the correct position on the canvas (example: draw it so the hat is on the cat's head correctly)
- rename the layer to "TraitTypeX" (where TraitType is the trait type..."Hat" in our example. and X is the next number in the sequence)
- repeat steps 1-5 above for the rest of your instances of this trait
Once complete with this trait type, move on to the next trait type until you are finished
It may be helpful to occasionally "spot check" how these traits will look together in a final file. If you are doing all of this in a singe file, you can occasionally hide/show layers to see how they would look when many of them are laid over each other in the final image. If you are using multiple files, you can try to copy/paste a layer from one file into another file. If you can't copy between files, then you can export one layer of one trait and import it into another file with different traits to see what it looks like with those traits together. It is best to occasionally "spot check" like this to ensure things look good while you are working. The last thing you want to do is spend 2 hours making a type of traits only to find that they won't work or look really bad when applied on your image.
Also, remember to save frequently and make backups of these files occasionally. You do not want to spend 6 hours on artwork to have the power go out and you lose everything since your last save. Saving to a thumbdrive or online storage will also protect you if you have a freak occurance of a complete computer failure where you can't even turn the computer on.
Making the Art Files
After i drew everything finally (which took forever) I realized I would have to individually save each layer as a file which would take hours on my chromebook. My dad saw that ibis paint lets you save a file as a PSD file which preserves the layers as long as you open the file into a program that supports PSD files. My dad has photoshop and that allows you to export all layers as individual files with one command. If you don't have photoshop, there are programs on the internet that can do this, but my dad says they are not guaranteed safe, so be careful, or just export each layer individually in ibis paint. When naming the layers in ibis paint, i named them all with the trait type name and a number at the end. Then when they were exported, they kept the same name. If your program does not keep the same name, you may need to manually rename each file. An example for the hats was that I named them Hats1.png, Hats2.png, Hats3.png and so on.
Generating individual files from each layer (so the generative art program can overlay them one at a time) may be tedious if you do not have photoshop or an advance image editing software. There are utilities on the internet to automate this process for you (or export all layers in a batch), but I did not research any of them. If you do not have photoshop, then it is probably fine to just bite the bullet and do this process manually in whatever program you used to create the multi layer files. You will likely only need to do this once and once you get in a rhythm exporting layers, it only takes a few minutes and not worth the risk downloading some unknown software.
Again, here is a good time to "spot check" your process. Export a few different types of layers using whatever process you plan to use. Then use whatever program you have to import each one into a new file and overlay them together to see what the final image would look like. Look for inconsistencies or artifacts (bad parts) on the edges of layers to ensure there is no strange borders or bad edges. As an example: one of our images for "claws" had a faded edge and when we layed it on top of our final image, it created this bright outline on the claws that looked really bad. So, we had to go and modify our "claws" source files to ensure this faded edge was not there anymore. Also look for forgotten transparent areas (where you forgot to make the area transparent and it doesn't let lower layers show through. Sometimes when you first look at a layer and the borders/edges it creates, it may look bad, but just layering the parts in a different order can sometimes fix this. As an example: our mouth accessory only looked good if we applied it to our drawing before applying the body outline layer (so it appeared "under" the outline). The order you apply layers may be important in your final product as each layer will cover up portions of deeper layers (layers applied before this layer), so it may look correct or better to try rearranging this layer order. To do that in your software, you can drag layers up or down to have them show above or below other layers. This layering order may be referred to as "z-order" in your program. Or sometimes the program/application will simply have a menu item for the layer to "send backward" or "send to back" to send that layer one level deeper or all the way to the bottom of the stack (for forward movement, it will be something like "bring forward" or "bring to top" to bring it higher up in the z-order).
Continue exporting all the layers until you have them all complete. It is a good idea at this time to make a separate backups of our individual files, just in case we run into computer problems later, or if we accidentally edit some of our files while we are testing our image generator. If we have a backup, we can always go back and grab an original to replace the one we messed up.
Here is a full list of all the files we ended up with.
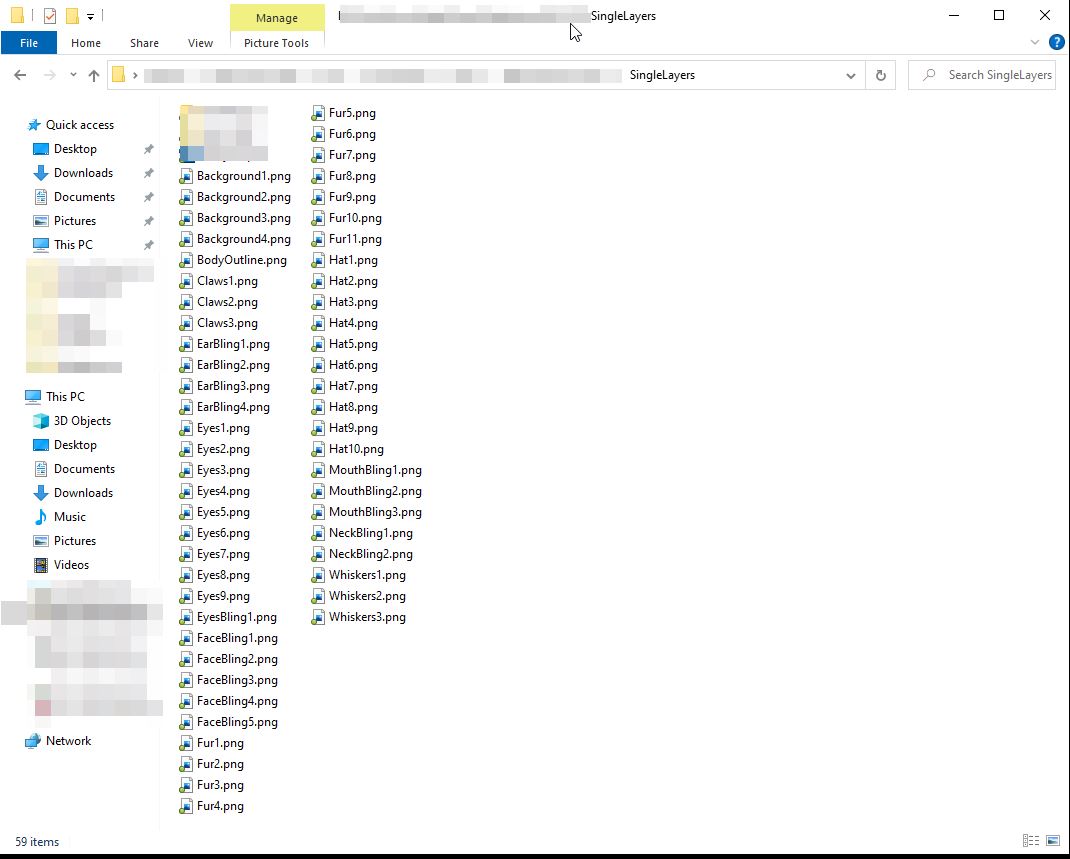
Code the Image Generation
Next we had to code the image generation. The image generation is basically where we are able to make all the layers get merged together into a different pattern everytime to make the NFTs unique. We also had to code if we wanted some stuff to be more rare than other stuff. An example is the rainbow fur should be very rare and not occur very often. Also, we did not want some of the accessories to show up every time, so we coded them to only occur sometimes. An example is the hats. We only wanted a hat to appear sometimes, so we coded it to be based on a percentage of the time. We also had to think about what order to layer them on each other so they don't cover up or get cover up other layers. We wrote our code in Python language and it was a little confusing at the start but after a while it was like I could get the hange of it. It was fun when the code worked and we saw a real live Meowsie.
Next we needed to write some sort of computer program to make our "generative art". When choosing a programming language to write your code in, you will often need to think of what you need the program to do, how often you will use your program, and how quick your program needs to be. There are 2 main types of programing languages. "Compiled" languages are usually for complex applications (like a game or a word processing program) and are typically more time consuming to write. They often perform faster when you run them, but are more difficult to troubleshoot (aka "debug"). An error in a program is called a "bug" and a lot of the work during programming is spent in finding and fixing "bugs". "Scripting" languages are usually much simpler and quicker when you are writing the actual code, but are usually much slower when the program is running. In programming, the code writing phase is called "design-time" and the code running phase is called "run-time". You may see those terms when evaluating which lanuage you want to use.
We will only be running this image generation program once or twice, and we wanted it to be very simple for others to understand and replicate, so we chose to use a scripting language. I chose the Python language becuause it is very easy to read, it's freely available, it can do simple image manipulation, and there is an immense amount of help available on the internet for when you run into problems. So, below you'll see our process for creating the program. I will not go into how to install python on your computer or which IDE to use because that is too complex for this tutorial. IDE means Integrated Development Environment and is just the software suite you use to help you write the code...sort of like using "Microsoft word" for writing word processing documents. I use an IDE developed by JetBrains which is not free, but "Visual Studio Code" (or just VSCode) is a wonderful IDE for pretty much any language (including python). Since we will be using a scripting language, you may hear me call us writing a "program" or writing a "script" interchangebly. When talking about scripting languages, people will refer to the program as a "script" or a "program" and use those words interchangeably...but they just mean the same thing. However, if writing a compiled program, you would not refer to your program as a script...only as a program.
One last step before we commit to using python, we should first verify the language can do what we need it to do. We need to be able to open .png files and lay them on top of each other while preserving the tranparency of the layers. So, i searched google for "python layer images on top of each other". The second result in google was titled "Overlay two samed sized images in Python" which seems exactly what we want. For safety...before I clicked the link, I double-checked which website it was. It was at stackoverflow.com which is probably one of the best sites I use for help with progamming so I trust them. Stackoverflow.com is a forum for people to ask questions, and then people give answers and then vote on them. So, i clicked the link and checked it out. I read the question (which is similar enough to what we want) and then scrolled down the page to see the answer that the community voted was the best (it has a big green checkmark next to it). It described using a python library called PIL (or Pillow). I don't need to know how to do the overlaying yet, I am just verifying it is possible. So, i then searched google for "Python PIL" just to get an idea what the library was about. The results that came back showed that PIL is a well documented library for image processinng in python and I felt safe that python with the PIL library would work just fine for our purposes.
Our final script is located in our github in a file called "GenerateMeowsies.py" and can be found here... https://github.com/meowsiesNFT/Meowsies/blob/main/GenerateMeowsies.py The instructions below walk you though each step, so it may be best to read the below first, and then once you are finished, you can look at our final script and see how it all came together.
Now we get into the actual process for writing our code. One method to help you write a program is using something called "pseudo-code". Pseudo-code is a way to write down in short words or phrases what your program will do. This helps you identify all the steps and the order of those steps. In this way, you can breaks down your main program into smaller, more manageable tasks. Pseudo-code is not actual code, and is not super detailed. It is simply a rough outline using normal words to give you a rough idea of what your program will do. It doesn't need to include the fine details, just the big steps. It is just a way to help you get started or help you break down something into smaller steps to make it more manageable. Here is the pseudo-code we came up with for our program....
- open the background layer
- open a random fur layer
- lay the fur layer on top of the background layer
- open the body outline layer
- lay the body outline layer on top of the background layer
- open a random eyes layer
- lay the eyes layer on top of the background layer
- sometimes open a random hat layer
- if we opened a hat layer, lay it on top of the background layer
- save the final image
The above pseudo-code just shows our most basic steps to generate a single image. It doesn't include all the layers we will need, but the additional layers will just be duplicates of some of the other steps, so we didn't need to get too complex and write those out. It also only describes how to create one image. But, to create multiple images, we will just repeat the whole process many times...which we didn't really need to write in the pseudo code (but it would not be incorrect if you did...there is no wrong way to write pseudo-code...it is just for you to help yourself)
So now we have our pseudo code, we can dive right in and figure out how to make this program. First, we open a new python script file, and start with the first step. It is a good habit to first write a comment in your code to describe what we are trying to do in that step. That helps you later if you are troubleshooing an error, or need to duplicate a section, or just help you find sections of code. Comments in Python start with a "#" sign. So here, you see we have blank script with our pseudo code copied in as comments....we will add our actual code underneath the comments as we get to that step.
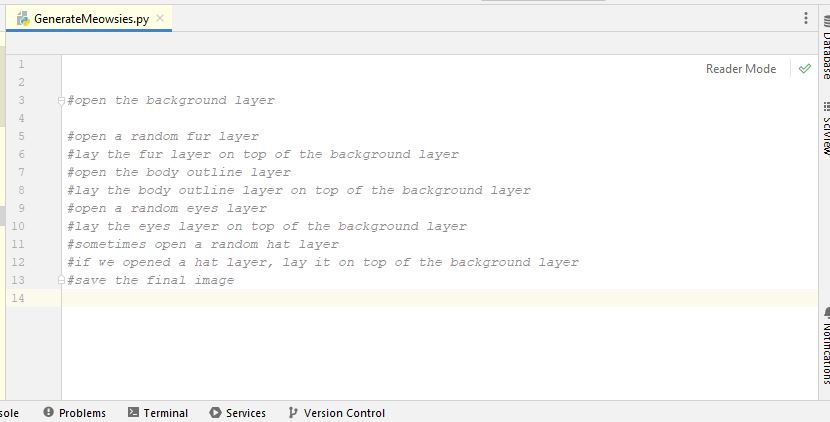
Now we need to figure out how to open and overlay images with PIL so we can get some of these steps coded. So, i searched google for "python PIL overlay images". The second result was again a stackoverlow answer, so i figured it was good. It was titled "how to merge a transparent png image with another image using pil"...which is exactly what we want to do. I clicked it and look, the answer is right there for us....
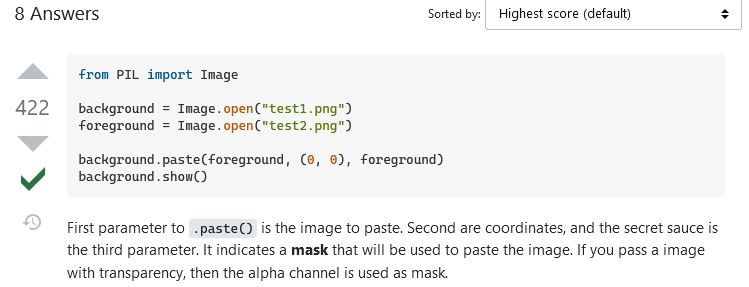
This snippet of code first imports the PIL imaging library (that is what "from PIL import Image" does). Then it opens a background layer, opens a foreground layer, and then pastes the foreground onto the background, and finally shows the image. It isn't saving the image, but we can figure that out later. So, we copy this code into our script file. You would put all your "import" statements at the top, so I put that at the top, but left the rest together under our first pseudo-code step just so we can see if it works. This is what we have now.
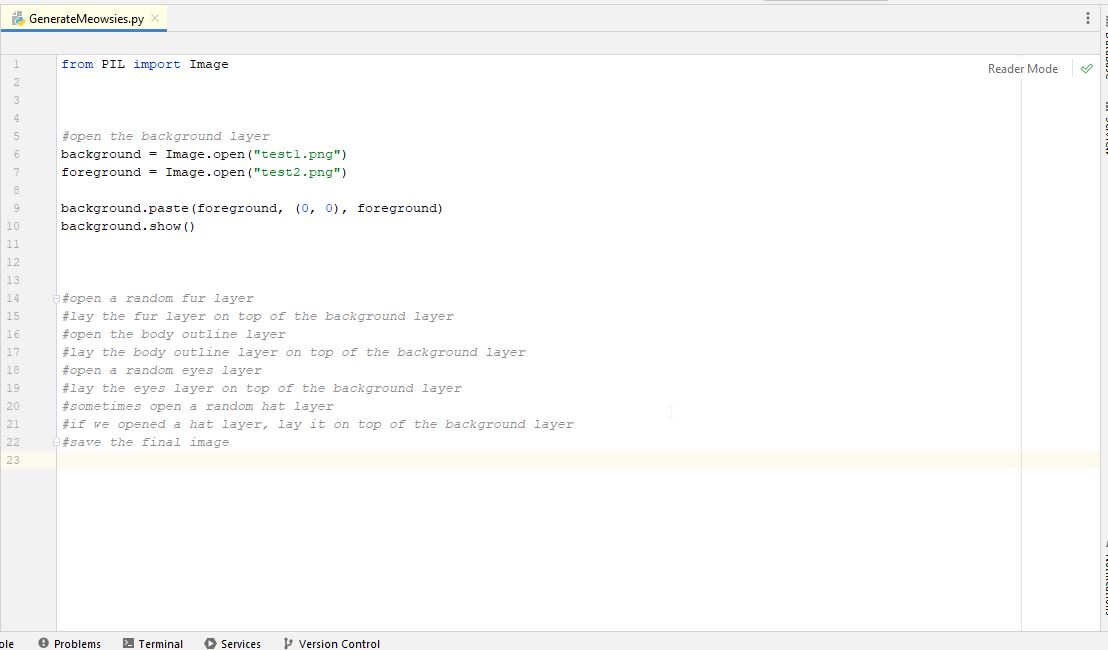
Now, we need to specify the location of our individual layer files in that "Open" function. You can either copy your individual layer files into the same directory (folder) as your python script, or specify the full path to the layer files. To make this easier to read, I will just copy my layer files into the same directory as my python script. Just make sure you "copy/paste" them into this folder, you do not want to "cut/paste" them because we want to ensure we always have the originals somewhere safe...if we cut/paste them here and we have an error in our program that deletes the files or screws up the images we will have to go back and re-export our layers all over again, which was not fun. Now that I copied my layer files into the same directory as my script, I can replace the location of the "background" image with one of our background layer file names (Background1.png) and replace the foreground location with one of our fur layer file names (Fur1.png). This is what we have now.
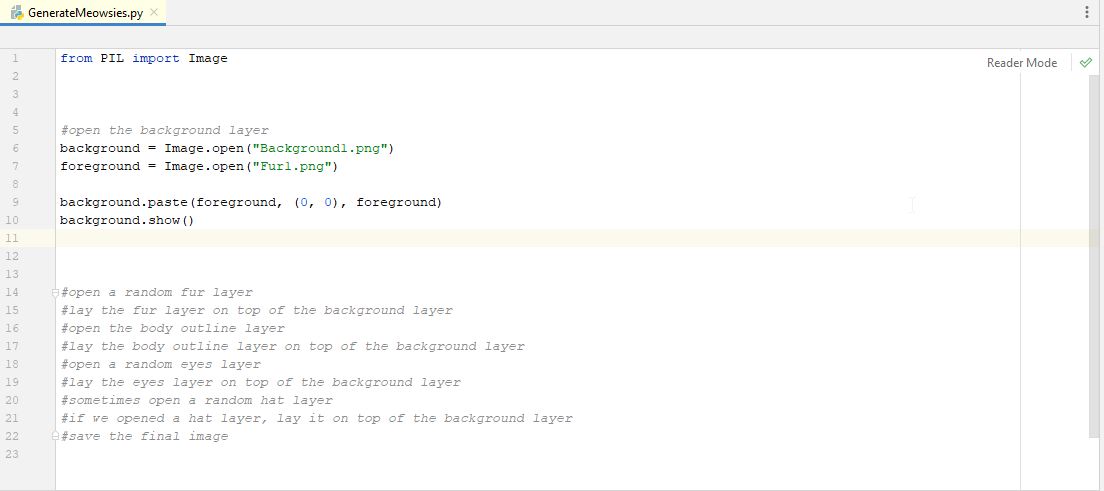
Now, we try to run the script (just to see if this even works). Running your python script will depend on the tool you are using to write your program. When you run it, you should see your image pop up and it should have your background layer and your fur layer (or whatever layer you used) layered on top. What the script did was open the background layer into memory (it is not visible when it is opened in memory, it is just available for our script to use it). It opened it in memory and assigned the (in-memory) image to the "background" variable so we can now just refer to it as "background" in our script. Then it opened the Fur image in memory and assigned that to our "foreground" variable. Then it pasted the "foreground" (Fur) image on top of the "background" image. This is still all done in memory so we can't see it. Then it calls the command to "show" the image, so it should then appear to you on the screen.
So now we know we can lay images on top of each other and it looks to work great. Great, we know some of the commands we'll use, so let's get back to our pseudo code. The first item in our pseudo-code was "#open the background layer", so let's leave our first line of actual code where it is (it opens the background layer). You may notice that the opening of the background layer is coded to always open onto the "Background1.png" file....and we have multiple background files we wanted to use, not just the one. We forgot to mention in our pseudo-code to open a "random background layer". But that's ok, it was pseudo-code, so it was just a rough idea what we wanted. Now we remembered we wanted a random one, let's code that. How do we open a random file? Well, we named all our background files like this... Background1.png, Background2.png, Background3.png and so one. So we need to find a way to just make a random number and replace the number in the file name. In programming, a word or section of words is called a "string". So the word "Background1.png" is a string. And all programming languages have ways to build a text string by adding smaller strings together. This is called "concatenation". You build a long string by adding small strings together. You "concatenate" the strings together. So, we need to find a way to concatenate the following stings...."Background" + Number + ".png"
Next we need to find a way to generate a random number. But we don't just want any number, we want a number between a range of values. For our background, we have 4 files, so we need a random number between 1 and 4. Let's search google for "python random number between 1 and 4" (i know this is pretty specific, but google is smart, it can figure out what we are searching for). The first result google I got looks pretty good. It is titled "generate random integers between 0 and 9". It's not exactly what we are looking for, but let's check it out. It shows us this as the most popular answer...
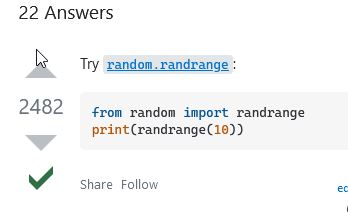
Since the question asked for numbers between 0 and 9 (including number 0), that chunk of code will give those numbers...but this isn't exactly what we want, so we scroll down to the next section and see something a little better. It shows us how to be more specific and tell the random number generator the starting and ending value. It looks like we can specify the lowest and highest number. This looks perfect.
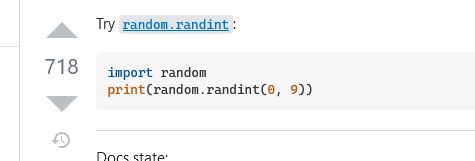
So, let's put this into our code and see if it does what we want. So we add the "import random" line at the top (this imports the random number generator library into our code so we can use it). When you run a command in programming, the command will often return a value to you and you must do something with that value. In this case, we will store the value into another variable that we will use to concatenate our filename string. So, we add a line to create and store our random number. We'll call our variable for our random number "randomNum". And we'll generate a random number between 1 and 4, so we put those into our call to "randint". Then we concatenate our filename string together to get what we want. But, we also have to add another command to convert our random number into a string value when we concatenate the strings. This is because the random number function returns an "integer" which is a number, not a string, so we can't concatenate it with other strings. Luckily python has a simple function to convert integers to strings, it's the "str()" function. Whatever we put in that function will be converted to a string, so we can concatenate that. This is what our final code looks like.
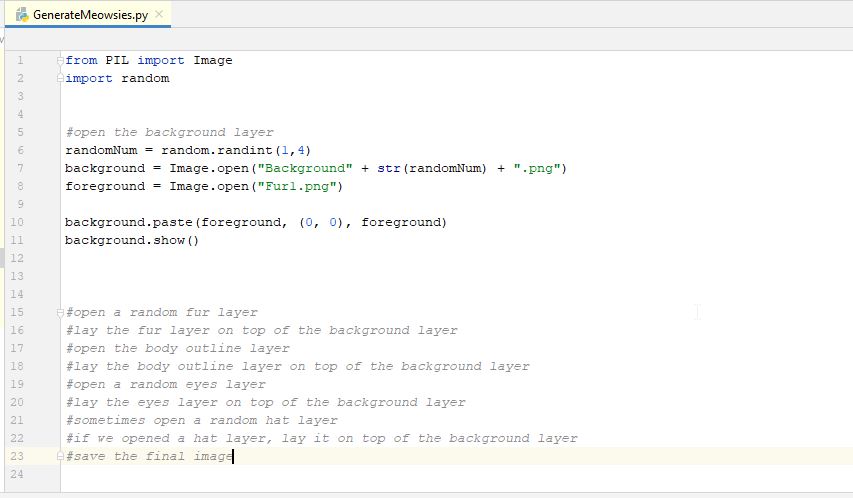
When we run our program, we should see a random backgound and our fur layer. Run the program multiple times and you should see a different background each time (sometimes you will see the same one a couple times, but it's random and that can happen). You should only see your single fur image though, because we didn't code a random fur yet. But this looks good. We are getting there.
Now that we are able to open a random background, let's duplicate our random logic for our fur layer. So duplciate the line of code to generate a random number again, and duplicate our logic to open the random fur layer by concatenating the strings. Make sure to modify the random number logic to have the correct start and end values for your random number. We have 11 fur layers, so we did a random number between 1 and 11.
We can re-use the same variable name for our random number (randomNum) because we are just re-assigning (overwriting) the value to that variable. This is fine because we only needed that random number to open the previous file, then we don't need to remember what it was, so we can re-assign it to a new random number in later steps. We also move the section to paste and show below our other pseudo-code for that step. So, now have this...
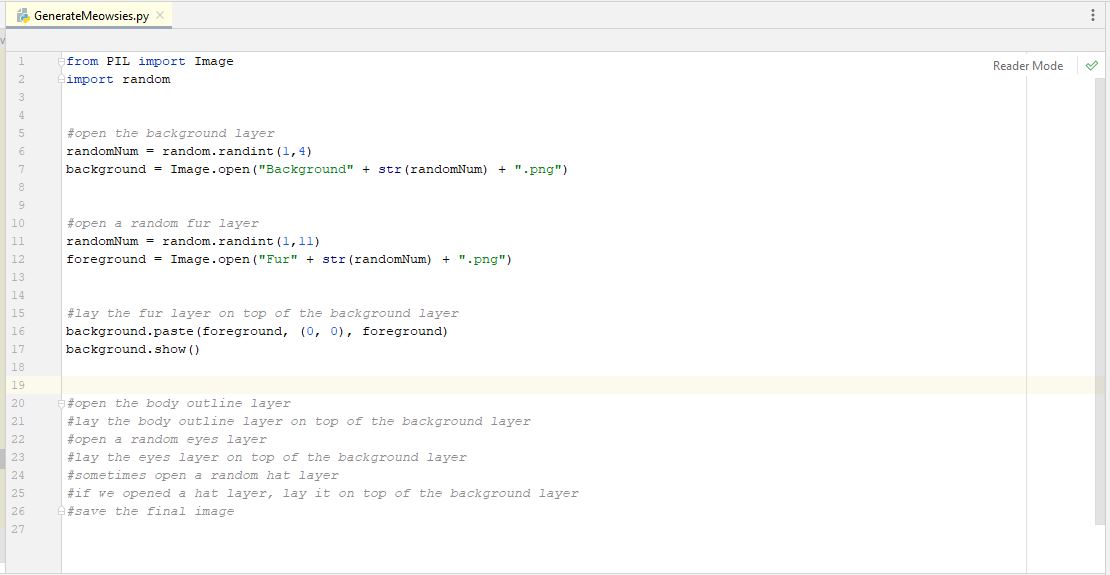
When we run that over and over, we should now start to see random background and random fur layers. Great, let's move on. Our next pseudo-code shows to open the body outline and lay it on top of everything. We don't have any randomness for this because we only have one outline type layer. You may not have one of these, but we did, so we have to add it. You will notice we re-use our "foreground" variable name also. This is because once we lay the foreground layer onto the background, we don't need to remember what the foreground variable was, so we can re-assign and re-use it. The background variable we do need to remember..it is the one we are modifying each time we lay a new layer down. So, under each of our pseudo-code steps, we add the code to open the outline layer and lay it onto the backround, we have this...
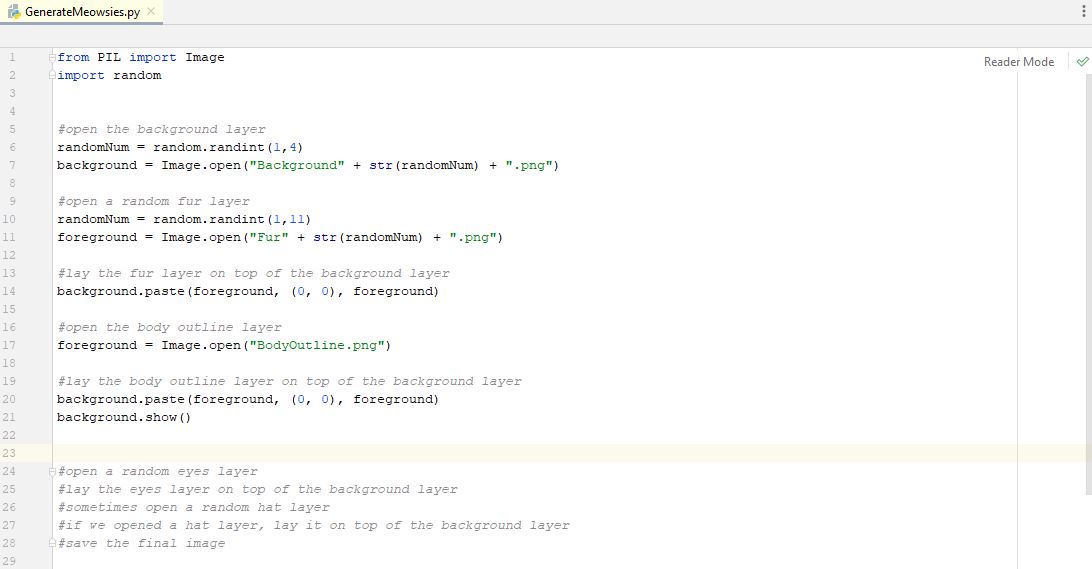
We run the program again, just to make sure we didn't introduce any bugs or errors. Everything looks good. So let's add a random eyes layer. Duplicating what we did for a random fur layer (remember to change the random number logic to only choose numbers for the number of different layers you have for this....we have 9 types of eyes, so between 1 and 9), we now have this...
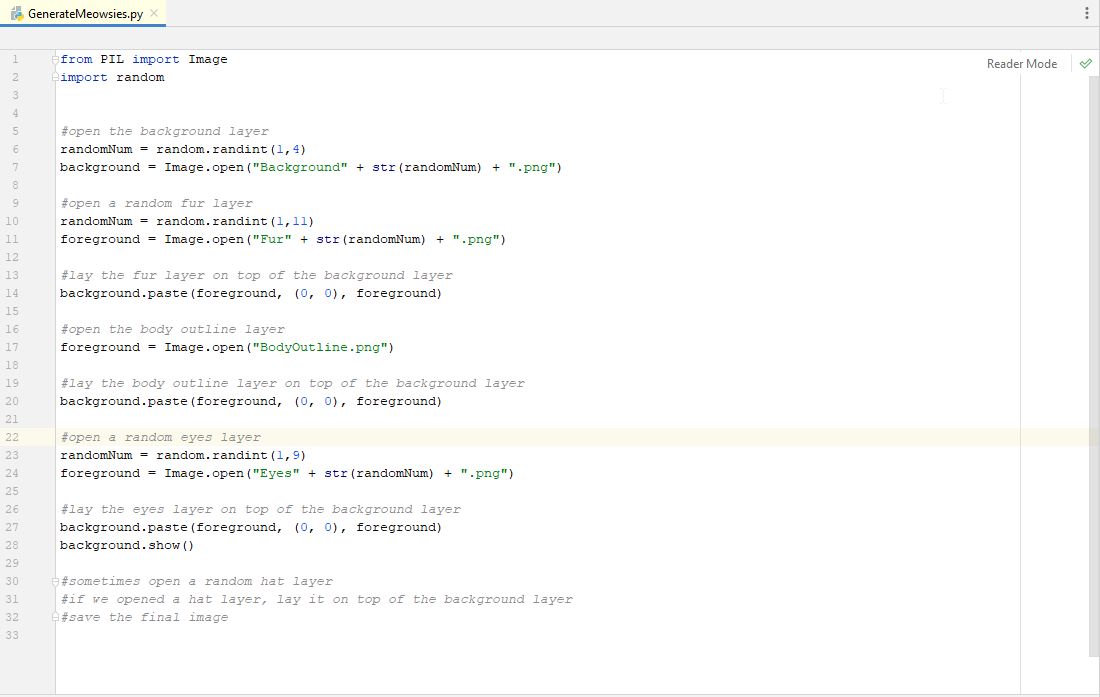
Now we get to our next line of pseudo-code. We need to "sometimes" add a hat layer. This is so our Meowsies do not always have a hat. We only want some of them to. So we need a way to only do something sometimes. We could say only a certain percentage of the time we want to add a hat. So, let's search google for "python do something a percentage of the time". We get a great result at the top titled "percentage chance to make action". When we look at that we see an easy answer.
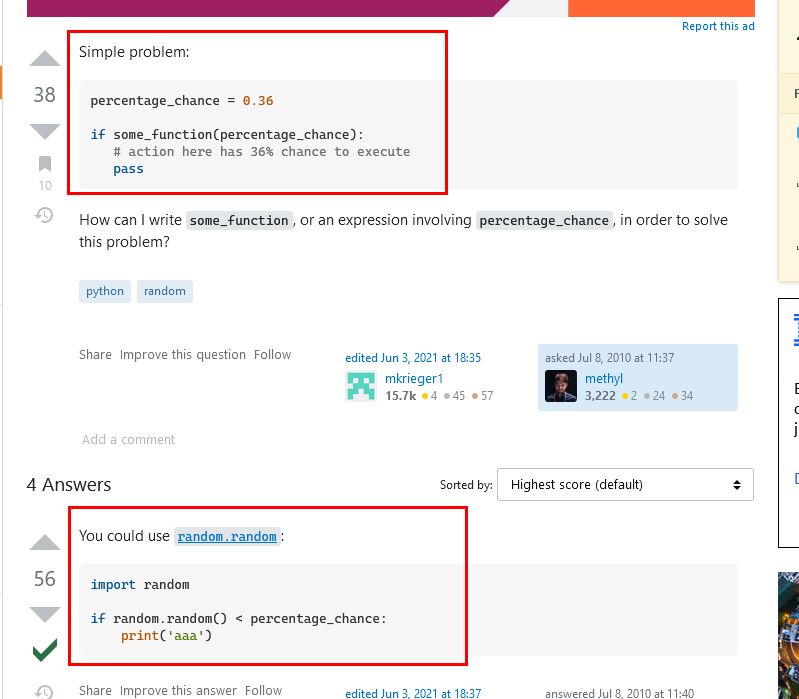
That code snippet shows we can just use the "random()" function and check the value and if it is less than a certain number, then we do something. The answer we got from google didn't tell us exactly why this works, but if we search google for "random.random()" we will see that it returns a number between 0 and 1. So, if we want to do something 20% of the time, we just need to check if this random number is less than .2 and if so, then we do something. This code also brings us to the "if/else" operators in python. Python uses white-space (space, tab, return) to identify blocks of code. So if we want to use an if statement, we will indent (tab) to make the code we want to run all the same indention level. So, let's say that hats will appear 50% of the time. That way half of our images should have hats. Let's put this logic into our code and duplicate our other code for choosing a random hat and put all the code under the correct sections of pseudo-code. Remember to move our "background.show" line to not be part of the "if" block, because we always want to show the image, even if there was no hat layer added. We now have the following...
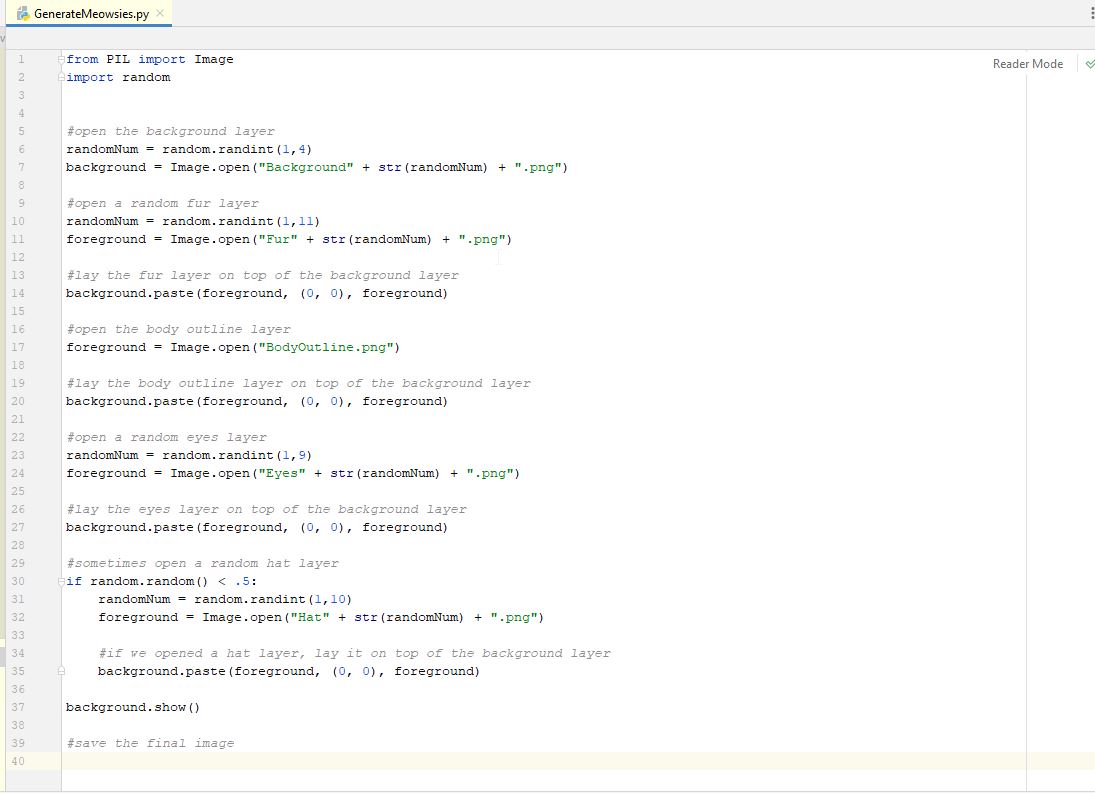
Running our code now over and over, we should see it sometimes has a hat, and other times it does not. It should be about 50% of the time. Everything looks good and we only have one more piece of pseudo-code to deal with. We need to save our file. So, a quick google search will show us how to use PIL to save a file. It's as simple as "background.save(filename)". So, let's save the image as "testFinal.png" and add that to our code and remove the line that says to show our image.
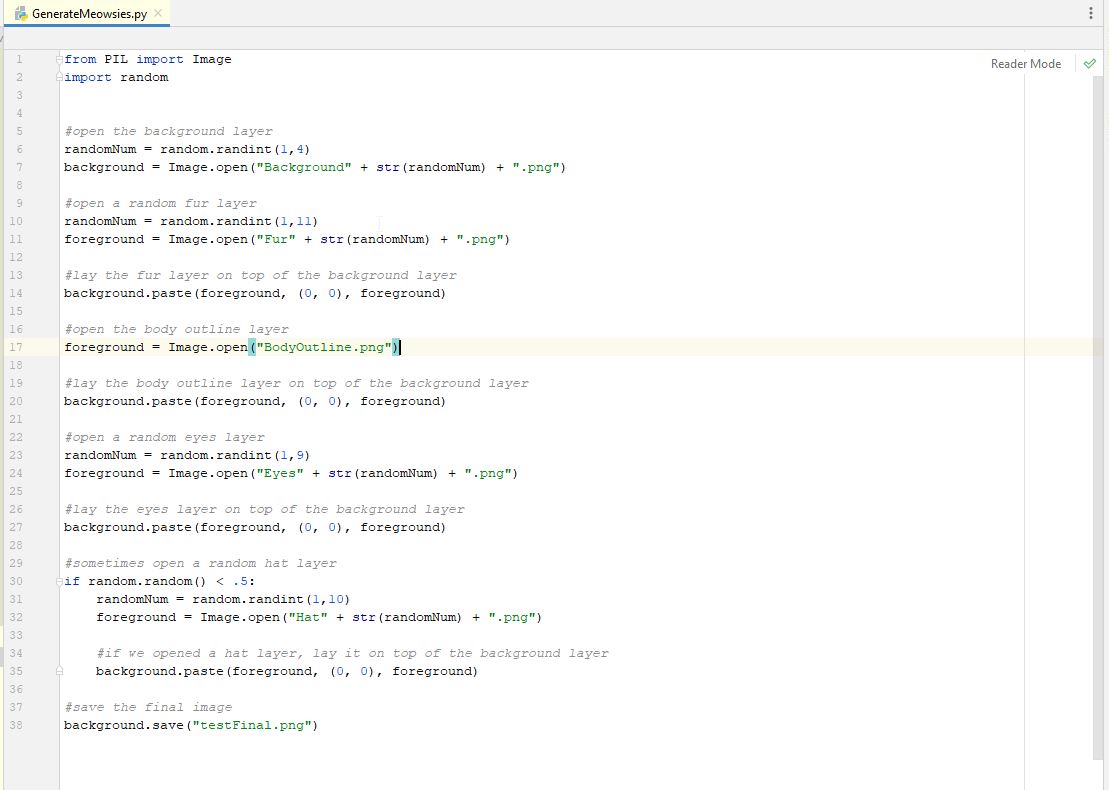
Now when you run the code, you should not see the image show up, but instead you will go to the same directory (folder) that your script is located and you should see a "testFinal.png" file. Open it up and see what you got. Then run the program again and open the file. It should be a new random image. Everything looks good. Now, we can have our program repeat this process over and over to generate multiple images. In programming, you can repeat something many times using a "loop". In this case, we know we want to run this process a set number of times. When you know how many times you want to loop something in programming, you will often use a "for" loop. You will loop "for" this many times. As a test, let's just loop 10 times. We search google for "python for loop" to figure out the syntax. The word "syntax" is the word in programming to describe the way you write a piece of code. It's the special words you use and the way you write them out in the code. So, let's search google for "python for loop". One of the results brings us to "www.w3schools.com" and they are another favorite place I like for coding help. The result from them shows us many ways to write a for loop. One of the ways sounds perfect for us.

The code snippet above tells us we can run a loop a certain number of times. When we run a loop we will often also have a "counter" variable that tells us the loop number (counter) that we are on. In the code snippet above, when we run the loop, the "x" variable will change each time we run the loop. The first time the loop is run in the snippet above, the value of "x" will be 2. The second time it is run, the value will be 3. That way we can use this "x" variable to know which number of looping we are on, and that will help us when we save our file...so we can save our file with this "x" number in the name, so we can have multiple files with different names. So, now we add our loop syntax. We set our loop range to go from 1 to 10. If you notice in the code snippet above, it also mentions that the "range" function does not include the last number in the range. So if we want to run our code from 1 to 10, we need to use 1 to 11 as our range (because the 11 won't be included). We need to indent all of our code that is part of the loop, so python knows which parts of code are part of the loop. Our line of code to save the image needs to be in the loop, because we want to save the image file each time we run it. We can also modify our code that saves the file to include this "x" variable, so we can save our images like "testFinal1.png", "testFinal2.png", "testFinal3.png". The "x" value is an integer so we need to also add the "str()" call to convert that to a string when we concatenate our file name. Because we will be using this "x" variable for some of our logic, let's rename it to something more appropriate so we don't forget what it is. Instead of saying "for x in range()" we will call the variable "loopCounter" so our loop code will say "for loopCounter in range()". Remember to also fix your line of code that saves the file to account for this new variable name we used. Adding all this together, we now have this..."
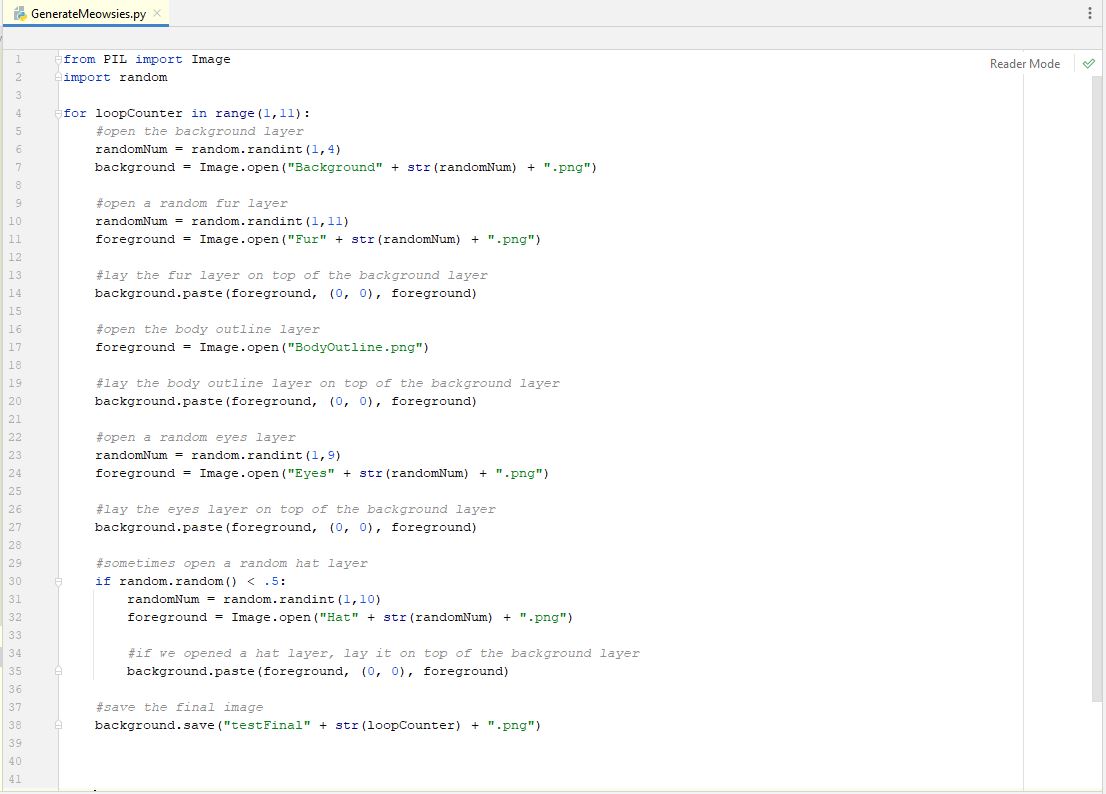
Now let's run our program. If you look in your root folder of your script, you should see 10 images with a filename like "testFinalX.png". Open them up and see they are all different. Now that we have a working program, we just need to add the rest of the layers that are part of our final image. To make this easier, I think we should group our code together better to make it easier to copy/paste sections. Let's put all the code together for each type of layer. And let's label each section with just the layer type. Basically we are removing our pseudo-code and putting in more meaningful comments. We don't need the pseudo-code in there anymore anyways. Grouping and putting more precise comments, we have something like this...(i did not change any actual code or re-order it, i only edited comments and removed blank lines).
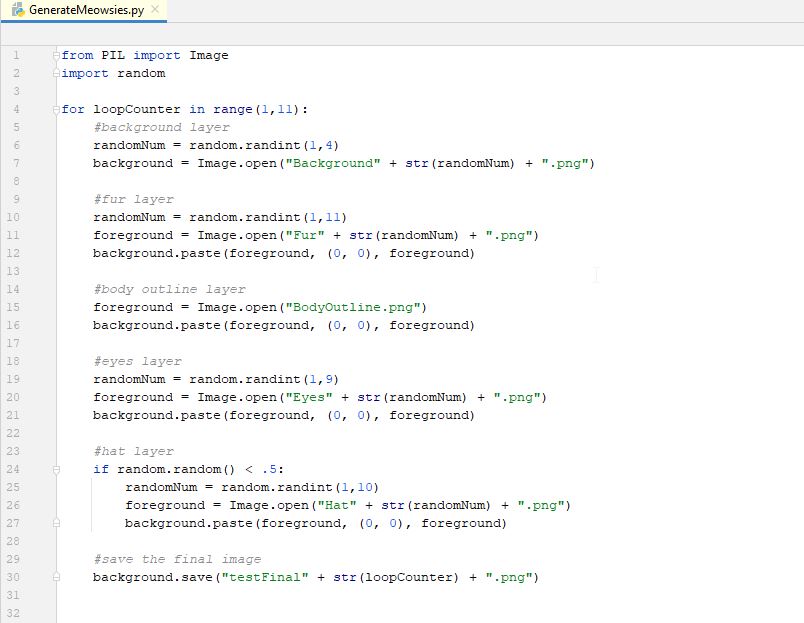
You see this is much more compact and easier to identify each section of code. Also, it looks very consistent which will make it easier to duplicate duplicate sections. Now we can duplicate sections for each of our other trait types. Duplicate the appropriate sections for all your trait types and then test it out. You may need to re-order sections if your layers need to be applied in a different order than you originally though, but you can play with that. That is why making a section grouped together well with a good comment makes it easier to move code around if needed. Now run your program again and see if it makes all 10 of your image in a good random way (and all the layers show up well).
Now that we have a good working program, we can add some extra logic to make things a little more interesting. In NFTs, some trait types (ie. fur color) or trait values (ie. fur color - red) are more rare than others. This is referred to as "rarity" of that trait type or trait value. If you want to add some rarity to your NFTs, you can make certain traits or even certain trait values more rare than others. Right now, we do have a rarity for some of our trait types. As an example, we have hats only occuring 50% of the time. What if we use similar logic to our trait values. To make this simple, let's add rarity to our Fur trait values. The fur trait itself is always applies, so the furt trait type has no rarity...it is always there, but each trait value has an inherant rarity (because there are 11 fur trait values to choose from), so each fur trait value has a 9% chance (1 divided by 11) to appear. Meaning, red fur has a 9% chance to occur, and blue has a 9% chance to occur. Let's make our rainbow colored fur more rare than the others. How about making rainbow colored fur only occur 5% of the time. That's about half as likely as the other fur types...so it will be more rare than the others. A super simple way to do this is after we have chosen a random fur to show, we add some logic to override (overwrite) the random number chosen with the rainbox fur number instead of the chosen number. And if we only override the value 5% of the time, then this should make our rainbow fur only occur 5% of the time instead of the normal 9% of the time. So, let's do this. Our rainbow fur is fur #1, so, add a line of code that says "5% of the time, re-assign the fur random number to be 1 instead of the random number chosen" (i will put this pseudo-code in our program along with the actual code). Here is what we get...
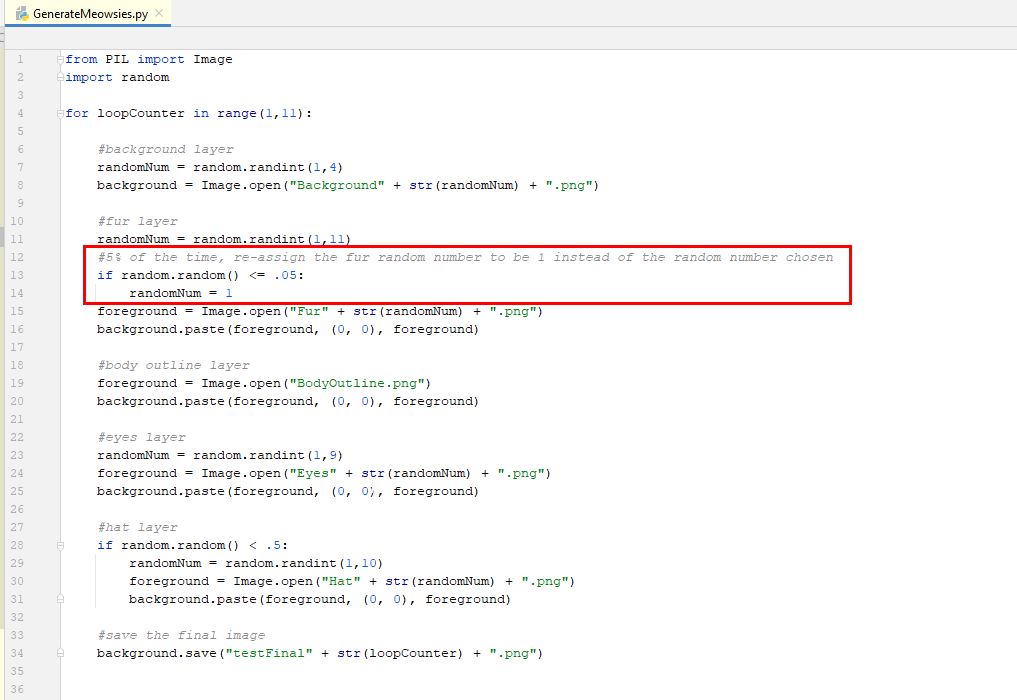
If you were a math wiz, you might realize that we are overriding our random number 5% of the time, but we also still have a 9% chance of rainbow fur occuring, because we are still choosing a rainbow fur from our first random number. So, because of the first random number, 9% of the time, the rainbow fur is being selected. Then if the raibow fur was selected or not, we also make rainbow fur override the selected fur 5% of the time. Again, i'm not sure how this affects the frequency, but we should just remove rainbow fur from our first random number selection. That way all colors will have 9% chance (technically 10% because we are removing the rainbow from the possibilities of the first random number generator) and then 5% of the time a rainbow fur is selected to override our random number. This is getting confusing, but the easy way to not have to deal with this, is to remove the rainbow fur from our initial random number logic. That way, the other 10 colors each have a simple 10% chance...then we do our override logic. That way, we know for sure that the rainbow fur always has a simple 5% chance. To remove the rainbow fur from our first random number selector, we got lucky. Rainbow fur is the first fur (item #1). So, we can simply set our random number generator to select a random number between "2 and 11" instead of "1 and 11". Our random number generator makes this easy, just set the range to be between 2 and 11. If your trait value you wanted to be more rare is somewhere inside the range (like 6 for example) then you may need to rename it to be one of the end values, or come up with your own fance logic. For us, we just need to change the range. So we do that here...
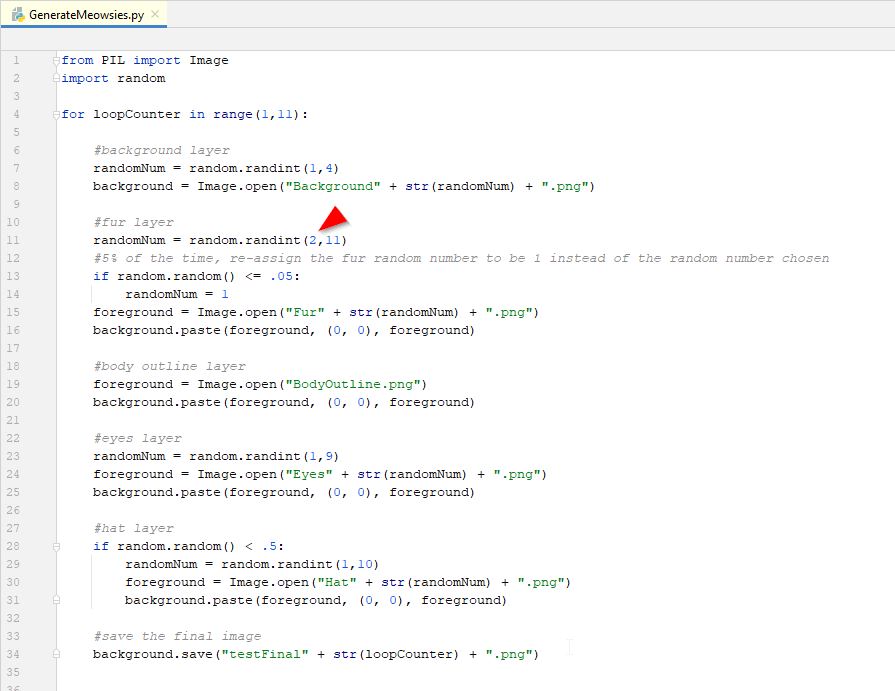
That looks good, run your program again a few times to verify your special trait is much more rare than the others. If not, you may need to take a closer look at your logic. You can also add this same sort of logic into other trait types in your code. Say you wanted to make the wizard hat more rare than all the other hats. Just duplicate the logic and make it occur less frequently. Then run your program again to check how it worked.
For the rest of this tutorial, to keep it simple, I will only have these few layers coded as shown above. Your code will likely have many many more sections, one for each of your trait types. Our full sourcecode is in our github repository if you wanted to see that. But this small script we show above will allow us to keep moving on without a long script to make it too complex. Programming is always starting simple and adding complexity as you go. That way you can do many tests along the way to make sure things are working correctly as you code and you don't end up with errors that are too hard to find. Usually, an error is added when you add new code, so if you check your work each time you add some code, you can find errors easier (it is usually located in the code you just added). For us, this above script is how we'll keep it for this tutorial and we can move on.
This is a good time to make a backup of our script. It is always good to have backups of your code in case you accidentally make a big change and it messes everything up. Also, you don't want to lose any work if your computer crashes.
Now, we are pretty much complete with our image generation logic. But, if you remember, NFTs also have a "metadata" file that includes information about the traits of your NFT. That is the next step.
Code the Generation of Metadata Files
Accoding to my dad, metadata is like information about something that you can use to group things in similar categories. He said it is like "tags" on data, sort of like hashtags in a tweet. He has a better idea on this.
Metadata by definition is "data about other data". It is not the actual content of something, but groupings or categories that describe that content. It is more about categorizing the content. Those categorizations of the content are the meta-data. It can be thought of as the "attributes" of something. An apple has color, flavor, texture. These are all metadata about an apple. When you decide to make an apple pie, you may want to choose apples that have a "tart flavor". Flavor would be a piece of metadata about apples, and "tart" would be the value of that data. So you could search for all "tart flavor" type of apples and you would get many different choices to make your pie.
For our NFT, we will create metadata. This will allow people to group and categorize our NFTs based on the traits we chose. The traits will be the metadata. The type of NFT we will be creating is called a ERC721 NFT. This type of NFT has a fairly well defined structure for the metadata. So, to ensure we don't make things complex, or non-standard, we will use the defined strucure that everyone else uses. The standard structure of that metadata looks similar to this...
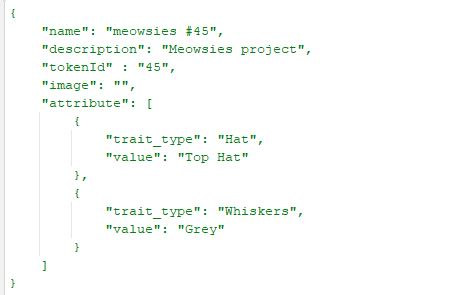
The metadata has info about the name, description, tokenID (just the token number in our collection), image location (we will get to this later), and attributes. For now, we are focusing on the attributes. These are the traits and trait values we are making for our NFT. So, each of our NFTs will have different traits and trait values, and we need to create an individual metadata file for each of our images that notates the traits types and values of that specific image file. Our metadata is stored in a certain text file called a ".json" file. This is just a special type of text file that computers use to easily record and read information that they all can understand so different programs and software types can easily convert information between each other. It's a standard format of file that most programming languages can easily read and convert into their own structure that is valid in that language. Hopefully one of those definitions made sense. In any case, we need to create a .json file (pronounced "jason" or maybe more precisely "jay-sawn"). And since we are creating our images in our python script, we should just add some extra code into our script to also create these .json files along with our image files.
So, how do we create a .json file. Well, we would search google for how to make a json file, but that would give us information about how to load and process json files. We just want to create a json file in the simplest way. Since json is plain text (not a fancy file type, just a plain text file), then we can instead, just create a plain text file, and when we save it, just name it .json instead of .txt. So, we just need to search google for how to create a text file in python. So, i search google for "create text file in python" and one of the results is from one of my favorite sites ( w3schools.com ). So, i go there, and it shows us this...
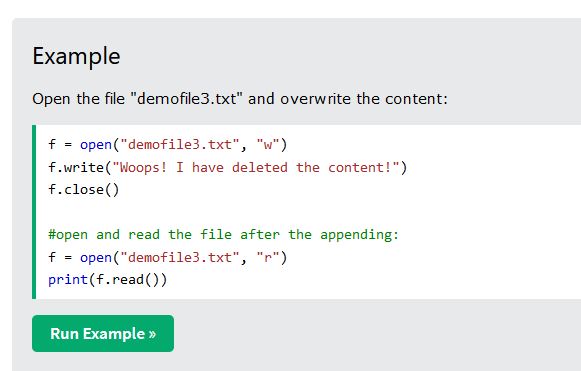
This has a little more info than we need, but it has the parts we do need. We need to run the "open" command to open a new text file with the filename we specify, then the "write" command to write our contents to the file, and then the "close" command to close it and save it. Super easy. Let's get to it. Looking at our example json file above, it looks like we need to fill in a few different things. We need to fill in token ID (which we will just use our loop counter number as our token id) and fill in some attribute info with the attribute (trait) types and values. For now, to keep it simple, let's just write json files where we populate the token id correctly, and use generic attribute (trait) data. This way we can verify that we have our basic file creation logic correct. Once we know that is working, we'll add extra logic to populate the traits correctly. So, we want to create a json file that just identifies the tokenid (loop counter number). JSON files by definition ignore whitespace and just use the different bracket characters "{}" and "[]", the color character ":", and the comma character "," to seperate data. So when we build our JSON file, we can do so without adding all the white space. Let's just copy our example file, and remove all the whitespace characters (except the whitespace between the quotes, those are the actual data and the whitespace is important. We end up with this....
{"name":"meowsies #45","description":"Meowsies project","tokenId":"45","image":"","attribute":[{"trait_type":"Hat","value":"Top Hat"},{"trait_type":"Whiskers","value":"Grey"}]}
I know this is long and confusing at first, but if we just read it one character at a time, it is easier to decipher. For our first test, we want to replace the tokenID value in the name and tokenID items. So, let's use our knowledge of string concatenation to change this string to have the correct token id in there (its the same value of our current loop number).
But, we now notice we have a problem. We have double-quotes inside of our string, and this will cause problems creating our string because in python, we use double-quotes as the identifier to notate which characters are in the string (so the program knows where our string begins and ends). We could add "escape characters" to our string to notate to the python engine that the quotes inside of our string should be treated as actual quotes, not begin/end of the string. An "escape character" in programming is a way to alert the program to ignore (escape) the normal meaning of the next character and treat it just like that literal character, not as a special character. But, python has a great feature fur strings. You can use either the double-quote character or the single-quote (apostrophe) character to surround our strings. So, if you need to have double-quotes inside your string, then you should use the single-quote character to surround your string. But, if you want to have single-quotes inside your string, you should use the double-quote character to surround your string. If you need both single and double-quotes inside our string, we would need to be fancy and concatenate a bunch of smaller strings together and use the appropriate single or double-quotes to surround the string depending on if we used double or single-quotes inside that specific chunk of text. Luckily for us, we just need to use double-quotes inside our string, so we will use single-quotes to surround the string.
Example: We need double quotes in our string, so we write...
myString = 'This is my string'
instead of...
myString = "This is my string"
That allows us to put double-quotes inside our string and not have problems.
Now we can add our 3 lines of code to create this text file at the end of our script next to where we save the image file. We replace the 2 locations of the token id number in our string with the "str(loopCounter)" value of our loop (that way the json file has the token number in the data) (of course we also convert the counter to a string using str() when we concatenate). We also use the loopCounter variable as part of our filename for this json file just like we did with the image file name generation. So, now we have this extra code at the end of our script to make this test JSON file. I've added some arrows to highlight the important parts...
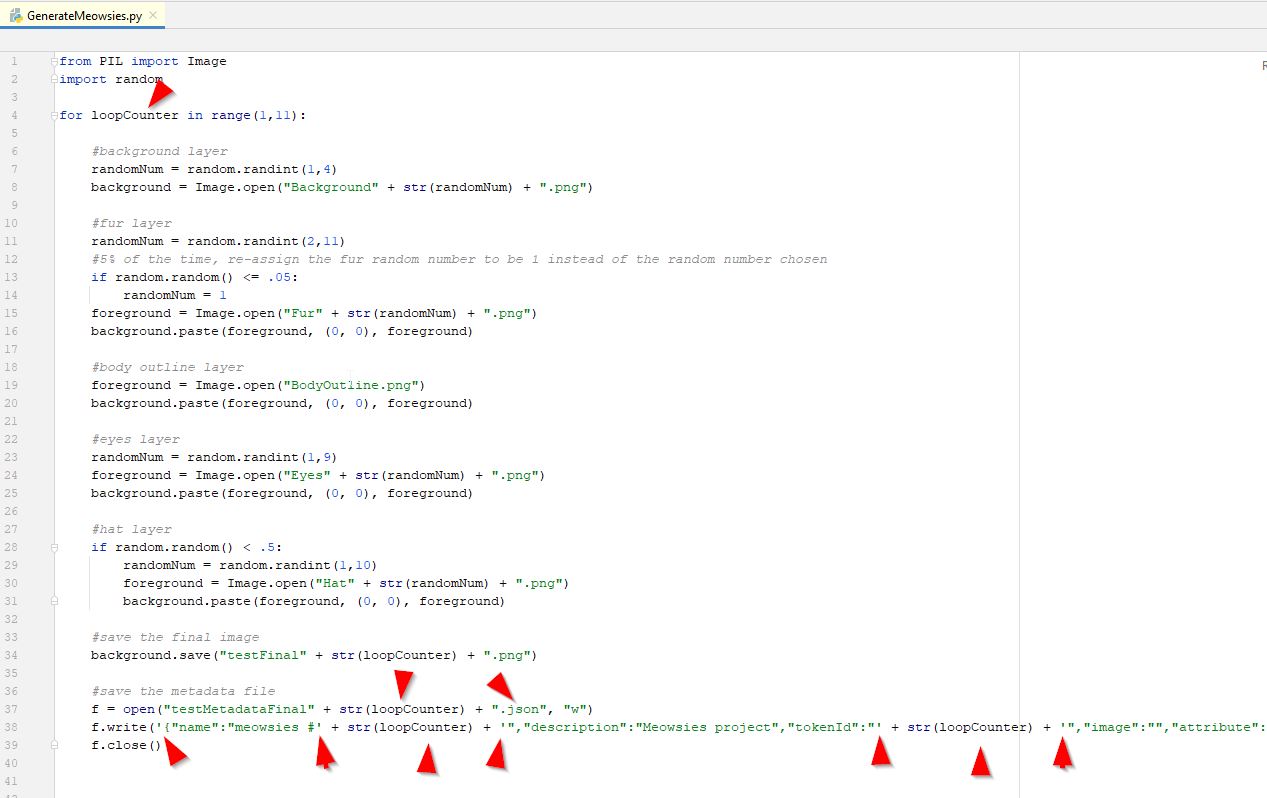
Now run the program and you should get all your images, and also the same number of .json files and each .json file should have the same tokenid number inside the file that is part of the filename. You can open json files with any text editor. A cool feature of most browsers is that if you open the .json file in the browser (just drag it into your browser) it should have options to format it it in a "pretty print" fashion, which will add indentations to make it much more "pretty" and "human readable"...but any text editor will work and you can manually add tab/whitespace to make it more readable.
Now we have working code to create our metadata file. But, we need to modify our code so it creates the metadata with the correct trait types and values. We notice our json file has this trait information in the "attribute" section. And if we look closely, we notice the format for that attribute section is in this form....
{"trait_type":"Hat","value":"Top Hat"},{"trait_type":"Whiskers","value":"Grey"}
So we can see that each trait is {"trait_type":"TRAIT NAME","value":"TRAIT VALUE"} and if there is another trait after that, there is an added comma (",") to separate it from the next trait. So we just need to add a little bit of code each time we add a layer that adds this trait name and value to our metadata. To do this, we will first add a new string variable at the top of our loop so we can build up all the trait metadata into a single string, and then at the end, we concatenate that metadata string into the right place in our code to write our metadata file. So, let's do this. We create a new variable and set it to an empty string "" This is called "initializing" the variable, and since we will reuse the variable each time the loop runs, we want to "re-initialize" it each time we loop (it is standard practice to re-initialize your variables you use during each . That way we don't have any left over data from the previous loop "iteration". An "iteration" is a fancy term for a single time through the loop. Each time through the loop is an iteration of the loop. So, we add a variable and re-initialize it (set it to a blank string) at the beginning of our loop iteration.
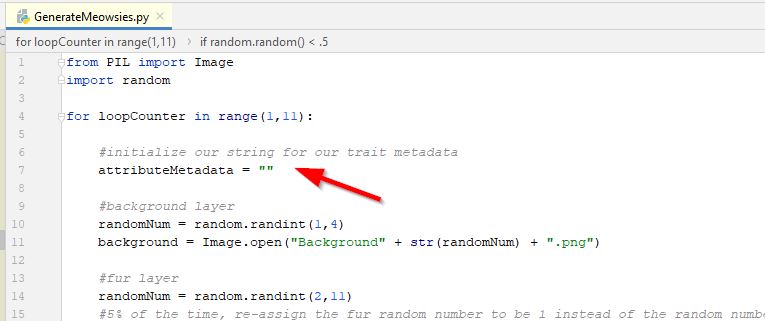
Now, each time we add a trait that can be different, we will add the trait type and trait value to this attributeMetadata string. But, how do we know the "value" for our metadata. We know that the "background" trait has a trait name, but what is the value of that trait? The value, is how you would uniquely describe each of those individual different backgrounds. We have a white background, a pink background, a blue, and a green. So how do we get these "values" into our metadata. Well, we know that everytime our random number for background is a "1" then we will use "Background1.png" which is a white background. And each time the random number is a "2" we will use "Background2.png" which is a pink background. So, we should come up with a way to identify the value, based on that random number we found. The background file names are consistent and a 1 will always give us a white background and a 2 will always give us a pink background. An easy way to relate numbers in programming is using an "array". An "array" in programming is a way to list a bunch of values and reference them by the order they are in the list. So the 1st item in our array, we want to be the string "white" and the 2nd item in our array, we want to be the string "pink". In python they have something called a "list" which is a essentially an array (they also have arrays, but they are more complex, so we'll use "list" type instead of array, but for our simplistic purpose they are the same). So, we want to create a "list" of strings for our backgrounds in the same order as our background files are named. So, our 4 backgrounds are white, pink, blue, green. We can put those into a list object using the following syntax...
traitValues = ["white","pink","blue","green"]
Now, we can access the appropriate text string using what is called the "index" value in our list. The "index" is number associated with the items in the array/list. We could say the 1st item in our list is the string "white" and has an index value of 1. The 2nd item in our list is the string "pink" and has an index value of 2. But...python uses what is called "0 based" arrays and lists. This means the indexes in arrays and lists start from 0. So, the first item in our list has an index value of 0, not 1. Most programming languages use "0 based" arrays, but some don't and you need to look up how your language does it. This is important because our random numbers for our background will be between 1 and 4, not 0 and 3. We could rename our background layers so they are numbered in a "0 based" way instead. Or, we can simply subtract 1 from our random number when we grab the string from our array. To make it easy, let's just subtract 1 when we specify our index number we are grabbing. In python, to grab the value at a certain index location in our list, we use the following syntax...
traitValues[indexNumber]
Using that syntax, if we wanted to grab the first item in the list, we would use traitValues[0] (remember it is zero based, so the first item is 0). If we wanted to grab the second item in the list, we would use traitValue[1]. Now we can figure out how to grab the correct value for the background our random number generator chose. We would use traitValues[randomNum -1] to get the string value associated with the background layer we used (remember again that the list is "0 based" and we need to subtract 1 from our random number to get the correct index in our list). So, lets add this code to specify our background trait values, and then concatenate our metadata string for the background trait and include the correct background trait value for the background that was used. Remember we need to include double-quotes in our string, so we surround our string with single quotes to allow us to have double-quotes inside the string. We also add a comma "," at the end because we know we will have more traits to add as we add more layers. Doing all that, we end up with this...(important parts are identified with a red arrow)
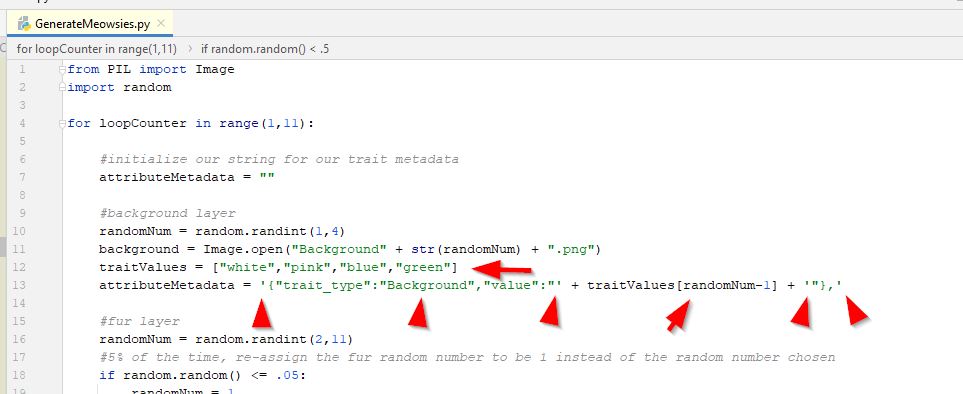
If we run our program now, and check our metadata, we will notice that our metadata for background didn't work. All our metadata still says the old value. This is because we created a new string to hold our attribute metadata, but we never used that variable when creating the data to save into our file. Notice the very end of our program, we still just have a hard coded value and are not using our variable we just created. "Hard coded" in programming means using a certain value that is not dynamic and is always the same....it isn't a calculated value or using a variable. We stil have our hard coded value. So, let's go to that line of code at the end and replace that hard coded area of the attribute metadata with our "attributeMetadata" variable. We end up with this...
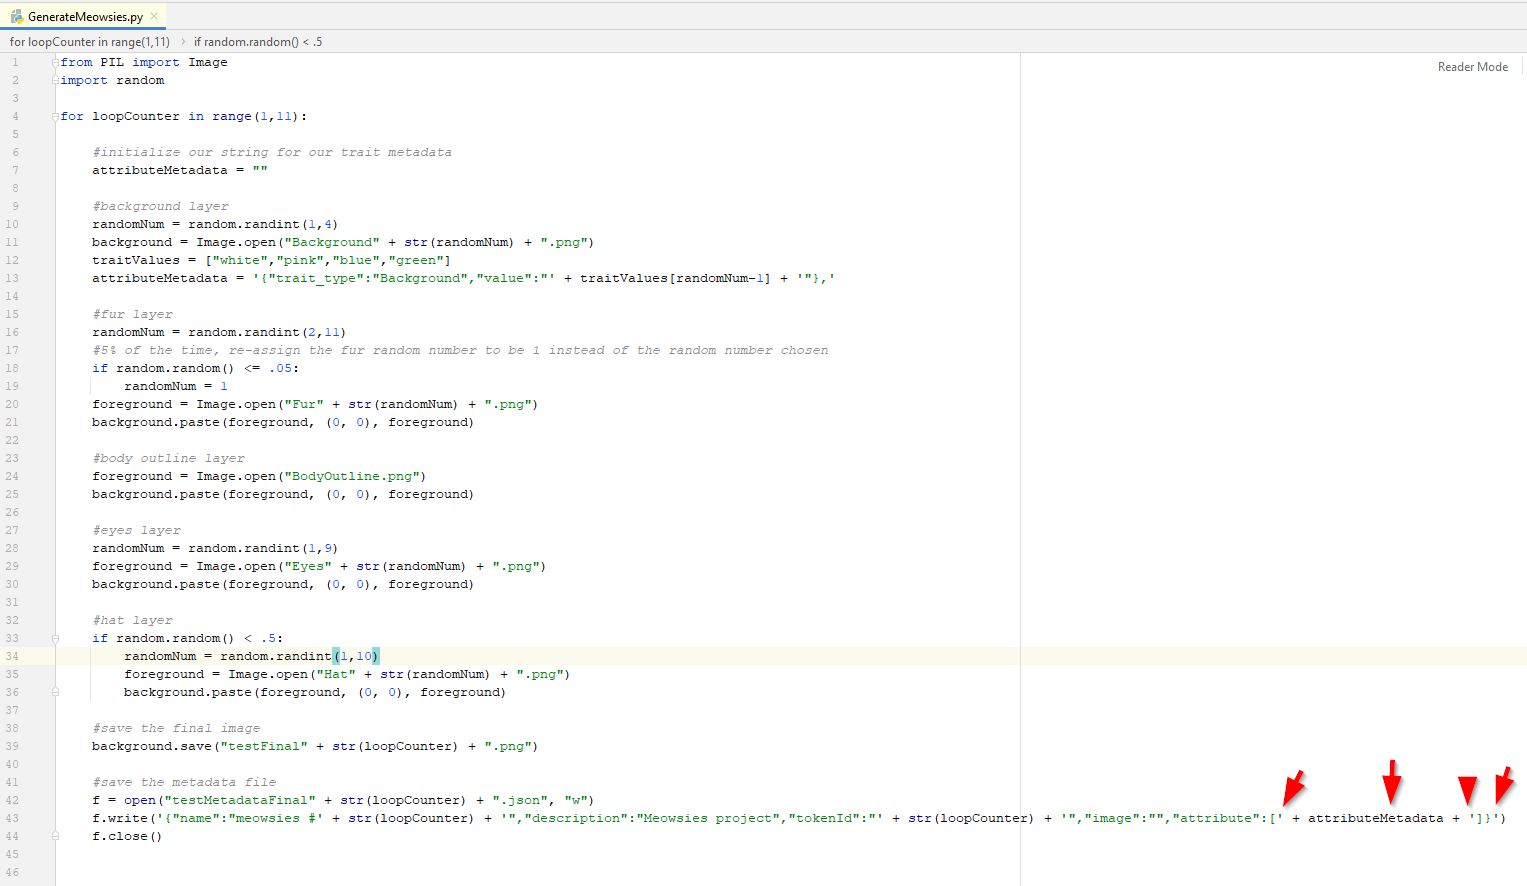
Now if we run the program, things look much better, open a few metadata files and compare to the image file. You should now have data that correctly identifies the background color used in the image. Now we simply repeat this process for all of our steps where we add a layer. Just add to our "attributeMetadata" variable each time we add a layer. One thing to note is that each time we add a layer and add the data to our "attributeMetadata" string, we do not want to overwrite the the text already in that variable. We don't want to overwrite the string. We want to "append" to the string. Append means to add additional stuff to the end. So we want to append the new trait data each time. To append to strings in python, we use the same concept of concatenation, we simply add to the string. So to append to a string, we just concatenate the current value of the sting with the new stuff to add. So, to append more metadata to our existing string, we would use the following syntax...take the current value and concatenate the new stuff onto the end...
attributeMetadata = attributeMetadata + '{"trait_type":"Background","value":"' + traitValues[randomNum-1] + '"},'
Most programming languages will use a shorthand way to do these types of actions. THey use the "+=" operator to do this. If you were to use the "+=" operator instead of the simple "=" operator as we did above, it would look like this....this code will give you identical results to the code above...
attributeMetadata += '{"trait_type":"Background","value":"' + traitValues[randomNum-1] + '"},'
It seems this syntax is a little confusing for new programmers, so I will not use it in our code, but you are free to use it if you prefer.
Go ahead and duplicate your metadata creation logic for each trait type if you haven't done so yet. When you have a layer that is not random and is always the same, you can decide if you want to add that metadata or not. You don't need to add metadata for something that is the same in every single instance of your NFT, but no one will say you are wrong if you do add it. It is up to you. I did not add metadata for traits that are not random (like the body outline). Also, the very last trait type you add, you should not include that last comma value, as it is your last item and if you add the comma, it may confuse whatever software is reading your metadata and make it think there is more data to read. We do have a very slight complication to account for. Our last trait is the "hat" trait. This trait is not always there. So it is not always the last trait in our attributeMetadata trait string. Because of this, we need add some special code that says "if no hat is added, remove that comma added by the previous trait". This will keep our traits with the last one always having no comma. You may not need to do this if your last layer always shows, but we happened to add our hat later last so we have to deal with it. Yes, we could have just moved our hat layer up so it wasn't the last layer added...but then we wouldn't be showing about this "gotcha" issue you may run into. So below you will see how we did this, when the hat is not added, the code goes to the "else" block and it removes the very last character from the string, which was the comma added by the eyes layer. We found the syntax for this by search google "python remove last character from string". I know the syntax looks confusing, but sometimes you have to just use the code given and ask questions later (when you are more experienced coding in that language). Here is what we ended up with..
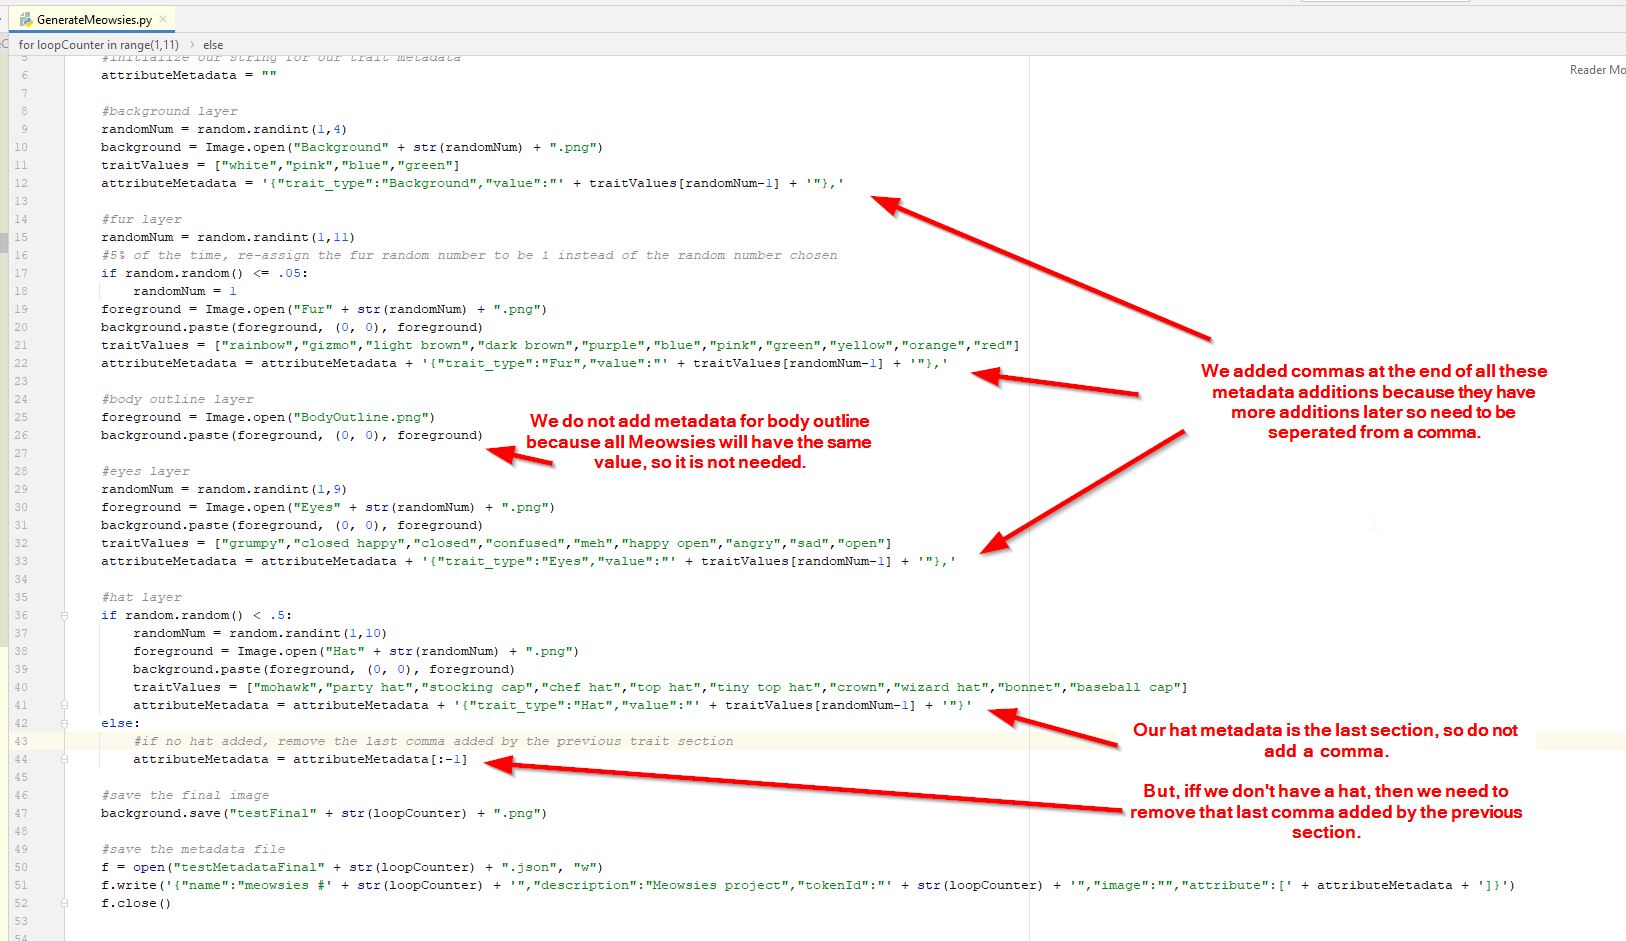
Run your program now, and you should have images and metadata that describes those images. Double check each type of trait to make sure all your metadata in the files matches the corresponding image file. Make sure your metadata values are correct and didn't get out of order (like a cat with brown fur has metadata that says it has yellow fur). Once you have it all good and you think things look great, make another backup of your script. We want to make another backup because we are going to test our script by setting it to loop 100 times, and whenever you test something that could create a ton of data or possibly cause a computer to crash, you should make a good backup as you may have to force quit your program if your computer runs out of memory, and you dont want to lose any work. Once you have a good backup, try changing your loop to loop 100 times (or even 500 times if you want to get crazy). You should see all the files generate and they should all be random and metadata should match.
At this point you likely have noticed that we are generating final images in the same directory (folder) as your script and source files. This makes it a little cumbersom to deal with all those files. Let's change the location our final images and json files are being saved so they go into their own folders and keep things a little cleaner and easier to manage (this will be much more critical when you start to generate hundreds or thousands of files). In programming, you will hear the term "directory" and "folder" often. They are the exact same thing. In old command line programming, they didn't have fancy images of folders on their screens, everything was text based (no images) so they called folders "directories". Then when the modern windows type operating systems came out, they gave these directories an image of a folder, and we started calling them folders. They are the same thing...they hold other files or folders. So, i will use the term "folder" sometimes, and other times refer to it as "directory". Just remember they are the same thing.
To get our script to organize our output files better, I am going to simply create 2 new directories in the same folder as where our script is located. I will call these folders "FinalImages" and "MetadataFiles". Now, we need to change our script to save the final files into those directories. To to this, we just need to add the new directory name at the beginning of the file name when we run the save commands. In programming there are 2 methods to specify a directory on the computer. There is "absolute path" (example: C:/users/administrator/desktop/testFolder/myFile.png ) and there is "relative path" (example: ./testFolder/MyFile.png). Absolute path is pretty simple, it is the exact full path telling the computer which hard drive to start at and then the full path to the file in question. Relative path is a little more tricky, it is "relative" to the currently running program or script. So, if my script file was located on the desktop of my computer (C:/users/administrator/desktop/), and i wanted to save a file in a folder called "testFolder" and name the file "myFile.png", i would have an absolute path of "C:/users/administrator/desktop/testFolder/myFile.png". To specify that same filename and location using a relative path (remember my script is located on the desktop), i could write a relative path of "./testFolder/myFile.png". The "./" is a special term that means "current directory" and the program will figure out where it is running, and then start going down the directory path from there. So it can find the folder and save the file mentioned there. There are different reasons to use both styles (absolute vs relative) and as you program more, you will figure out when each method is more appropriate. In this tutorial, we have been using "relative" paths. I'm sure you noticed whenever we loaded or saved a file, we never specified the folder those files were located, we only specified the file name to save/open the file. We were using relative paths and were referencing files located in the same directory as the currently running script. That is why you had to copy your layer files into the same directory as your python script file. And the same reason your final images and metadata files were being saved in the same directory as your script file. When specifing just a file using relative paths you don't have to add that "./" to specify the current folder...the script knows that you are talking about a file, so lets you skip adding the "./". We will use this relative path method to save our files into the 2 new directories we created. Since we are specifying a directory and a filename, we do need to add the "./" part. So for our final image files, we will add "./FinalImages/" to the beginning of our image file name, and add "./MetadataFiles/" to the beginning of our metadata file names. You maybe noticed at this point that we are using the forward-slash character "/" and not the back-slash character "\". When you look at a file path in windows, they use the back-slash, so why are we using forward-slash? This is because the back-slash character is a special character in python. It is what is called an "escape character". It tells the program to ignore the normal meaning of the next character and do something special instead. There are times you need that, but right now, we don't want that to happen, so we specify all our file paths with the forward-slash character. Python is much happier using the forward slash. If you really wanted, you could use the backslash character in python for your file name and path, but you would need to use 2 back-slash characters instead of 1 in each place you put it...the first backslash says, the next character is not normal and is special, and the 2nd back-slash says I'm the special backslash...which is actually just a normal back-slash, instead of an escape character back-slash. Kind of like a double-negative. The program runs fine using forward slash, and it's easier to read, so we use it. So we end up with this...
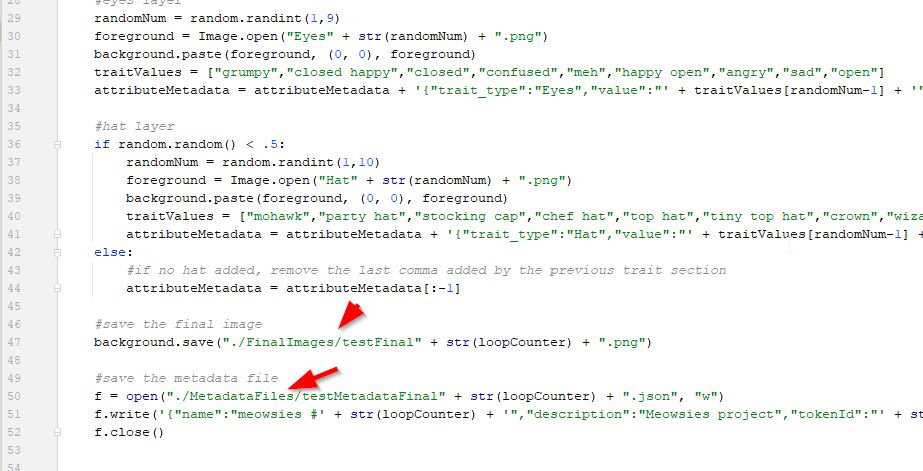
It looks like we are using "test" file names still for our generated images and metadata files. I think we are past the test phase and we can remove that. So, I changed the filenames to just be the loop number. So instead of having image files named "testFinale13.png", we'll have the file named "13.png". This will make our process easier and cleaner later when we reference these files in our smart contract and NFT code. After making that change to fix the file names, we have...

Now is another good time to make some more backups of your files. Once you have that you can run your script for large set again (100, 500, or even 1000) and do some spot checking to make sure they all look good. Also look over them to see if maybe you should adjust the frequency of ones that you had only appear a certain percentage of the time. Like if the hats are appearing too often, maybe you should reduce the frequency of them occuring.
Don't generate your full set of final images at this point yet. If you want, you can do a full run if you want to do some major spot checking, but we will still need to come back to this script to make a couple final changes later. Now we can move on to the next step in our NFT creation process.
Where to Store Final Images
For you to see your Meowsie we have to store our image files somewhere. We can use our website and as long as we pay our website bill you will be able to see them or we can store them on an internet cloud computer called IPFS which will let them be there forever. My dad knows how to do both ways so we will decide which way to use when we are ready to release our project.
NFTs should last forever. That is the purpose, on-chain, decentralized, information. But, NFTs usually point to an image file (and as we have seen, a metadata text file). But, where are these files stored. What if the place that stores them stops working. There are some NFTs that are called "on-chain" and they store their image data and metadata on the blockchain itself. This type of storage creates very high fees for when you create your NFT. The subject of on-chain storage is too big for this tutorial, so, for now, we will just accept the fact that storing our data on-chain is too expensive. So we need to find a different place to store our actual data, and we will set our NFT information to look in this alternate (off-chain) location to get to our image and metadata data. Some NFT projects will store the images and metadata files on their web servers. But what if the project decides to shut down one day and stop paying for their websites? The NFT will go blank and show no image or metadata anymore. That's not good. There is something that exists that is called "IPFS" (InterPlanetary File System) that allows you to upload files and they are distributed across the planet and don't become dependent on some single place storage that you pay for. Is IPFS free? Well, there is a very complex answer to that. For our simple use, we can use the IPFS service for free. The place that allows us to use it for free is https://nft.storage. They provide a free service for us to use IPFS. They say they intent to keep it up and functioning for "a very long time" and since file storage is relatively cheap (and getting cheaper every year), they may succeed at this. So, let's just assume they will be able to provide this service for free forever. And, we will add special code in our NFT to allow us a safety net...we will code our smart contract to allow us to change the location if we ever need to. So, we should be good. Great, we have decided we will store our images and data files on IPFS using https://nft.storage
So go to https://nft.storage and set up an account. Setting up an account there is essentially just putting in your email address and then they send you an email to log in. There is no password, it's just an email address. Each time you try to log in, they send you a new link to click in your email and it logs you in. It's a little confusing at first, but just remember there is no password...whenever you want to log in, you go to their site and they send you a new link in your email that you click and you log right in. Remember to use your "business" email as described in all the steps above about credential management, I recommend you don't use a personal email. Once you have an account set up, we can move on.
Before we create all our final images and upload them to IPFS, we need to make another decision. First, you need to know about a term called "minting". Minting is the term used to create a single NFT (not creating a project like what you are doing, but creating a single instance of your NFT.."minting" is what your users will do to create one of your NFTs). Just like the federal reserve "mints" coins....we "mint" NFTs (remember they are tokens...so the term stuck). When you deploy your smart contract for your NFT, your users will "mint" one of your NFTs...they create one of your NFTs. Minting an NFT will create the NFT placeholder in the contract and assign that NFT to the person who minted the NFT. Because we aren't storing our image data "on-chain", this minting process is just creating the NFT that points to our image/metadata data. So, we need to upload that image/metadata information to IPFS somehow so they can see the NFT. If we upload all of the image/metadta data before people mint our token, there is a trick that some people will use to cheat the system in a way. They can mint one NFT, then look at where the image data is located, and then figure out where all the image data is stored. They can then figure out what an image would look like for a NFT that has not been minted yet. They may look and say, "Oooh, look at token number 321. That one is really cool and rare!!". So they may wait for other people to mint all the other tokens up to #321, and then quickly mint token number 321 for themself. That is called "leaking metadata". It lets people see beforehand what each NFT will be and they can cheat and only get the ones that are rare. This happens when you upload all your images/metadata before people mint tokens. One way around this is to set up our minting process so it automatically uploads the image/metadata for each NFT individually one at a time, right when someone mints it. So, like when someone mints token id 246, we upload the image and metadata for token id 246 right then...that way no one knows what the future holds (because we haven't uploaded the future ones yet). This is a lot of extra programming that we would need to do (much more than I could write in a tutorial like this). Another (simpler) way that is very common for NFT projects is where you have your whole collection "unrevealed" during minting. This means they are sort of hidden and you can't tell what any of them look like. Once you are ready, you (the project owner) "reveal" the collection and everyone gets to see what they got. When projects do this, they make a generic image and generic metadata, and point all NFTs to this generic data. So when people mint their NFT, they go and look at it and it is a generic "unrevealed" version of the NFT. Then when the project owner is ready to "reveal", they will upload the final images and metadata and everyone then gets to see what they ended up with. Their images are revealed. This is the easiest way to ensure no one cheats the system, so let's do this. To do this, we have to first make a "unrevealed" version of our NFT. A few different ideas for an unrevealed image are to take 10 or 20 of your actual final images that a good variety of traits and trait values and make an animated gif that just flashes through all the different images. Or, sometimes people will make like an outline or a shadow looking image...like if you were looking at the subject of your NFT in the dark or low light room...you can sort of make out the shape, but can't see any detail. Anything you come up with will work, but remember that everyone will be seeing this image as their NFT until you "reveal" their true one. So it may be a good opportunity to do some advertising or marketing using this image...if it looks really cool, you may attract new customers that didn't know anything about your project. Create that unrevealed image now, we'll need it in the following steps.
Once you have created your "unrevealed" image, you should then create your "unrevealed" metadata file. We need an unrevealed version of our metadata files so no one can read the metadata for our final images...we made an unrevealed version of our image file, but if someone can simply read our metadata about the revealed version of our image, it defeats the purpose. So we need to create an unrevealed version of our metadata files that doesn't include the actual trait values of our final images, we need it to be generic and not give any hints as to what the final image will look like. Our unrevealed metadata files shouldn't be exactly the same for all of our NFTs. We should have the actual token ID and the actual token name in the metadata. That way people can differentiate the different NFTs on the marketplace and they don't all have the exact same generic name. Suppose someone wants to buy token number #32 in the unrevealed state because they think that number is lucky...they will have a virtually impossible time to find token number 32 if all tokens are named identically without the number in the name. So we will put the token id number in the name even in the unrevealed metadata.
So let's also create an unrevealed version of our metadata files. Let's start with our original metadata format we had above and just modify that. Here it is again for convenience...
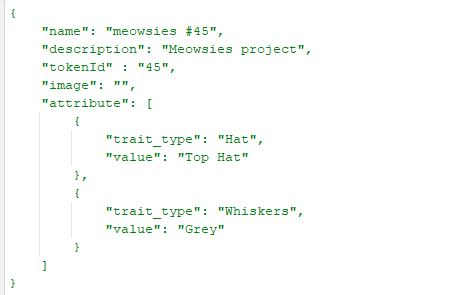
For our unrevealed metadata, we want to pretty much have everything the same except we don't want to include the attribute section. So, let's just remove that whole attribute section and leave the rest the same. Let's go back to our python script. First create a new folder for our unrevealed metadata. I called my new folder "UnrevealedMetadataFiles". Then I duplicated the section of code to create our metadata file. I modified the code to use the new directory I created, and deleted the part of metadata for the attributes. And this is what the new code looks like...

You can run your script again now and you should see it creates images, normal metadata, and unrevealed metadata. Double check the unrevealed metadata to make sure it has the token number in the name and looks correct. Don't run your script for your entire collection yet...we aren't ready yet, that will be soon.
You probably notice our metadata has the "image" area and we've been keeping the value for image as an "empty string" (an "empty string" is sometimes called a "blank string", is basically a string with no value....like saying nothing). Since we are in the "where to store our images" step of our project, we can likely populate this value now.
The next few steps are going to be a bit complex and it may not make sense why we do these steps in this order as it sounds way too complicated, but it is required to make this whole "reveal" process work. To help you understand why we do this complex process, it helps to explain how IPFS works. IPFS works by creating a special identity string for each file you upload. This identity string is called a "CID" (content identifier). Once you upload a file to IPFS, the CID value is created based on the content of that file...and you cannot modify the contend of the file without modifying the CID value. So, files uploaded to IPFS are not editable...you cannot change them. Once you upload a file, you get a CID value. If you want to modify the file, you have to upload a new file, and then get a new CID. The reason this is important is because our image value we put in our metadata needs to point to image file for that NFT. We generate our image files and our metadata files using the same script so they are created at the same time. But, we need to know the CID value for our image file when we create our metadata files. But we can't get our CID value until after we upload our image files (which is after we already created our image/metadata files). We have the chicken and the egg situation. We need the image CID value before we create our image/metadata files. Hmmmm...this is a conundrum. To get around this and be able to generate our metadata and images at the same time, we will follow these steps in this order...
- populate our image CID value in our metadata with a generic CID value
- run our script to create all our images and metadata
- upload our image files and get our CID value
- do a find/replace in our metadata files to replace that generic CID value from step #1 with the real CID value from step #3
- upload our metadata files that are now correctly pointing to the right image CID value
That process will allow us to create our images and metadata, and then later, after we upload the images, we fix the metadata files to point to the uploaded images. So what "generic" CID should we use for our metadata in step #1 above? We have a very easy choice. Remember that we are going to use the "reveal" process where we create a "unrevealed" version of our image. We can create that image now without using our script...so we can upload that image now. Then we can use that CID as our "generic" CID value in step #1 above. We will also be using that CID in our unrevealed metadata files...so we'll be using it for 2 purposes...as the unrevealed image CID and as a temporary placeholder when we create our real metadata files in step #1 above.
So, let's just get started and get through this so we can get to the end and then it will make more sense. First, let's upload our unrevealed image we created to IPFS. Log into your nft.storage account and go to the "Files" area. There is a button there to "+Upload". Click that. Then choose the unrevealed image you created for your collection and click the "Upload" button. You will be returned to the Files screen and it will show that your file is "Queued". That means it is in the process of getting added to IPFS and it may take some time, but we can move on and keep coding because it has already created the CID value we need. Click the "Actions" button on the right side and then click "Copy IPFS URL". This will copy the URL that we can paste into our image value in our metadata.
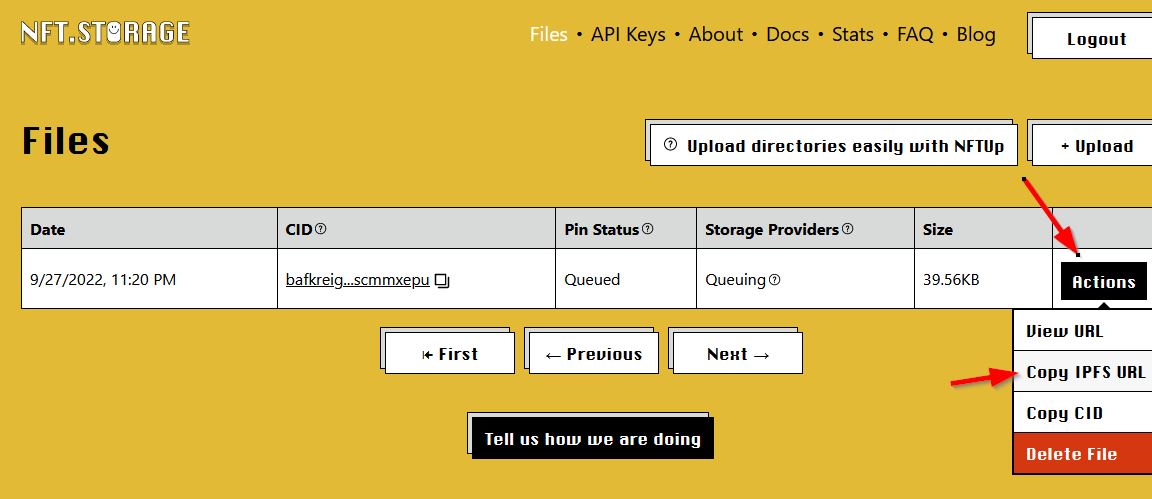
Since we will be uploading multiple things to IPFS, we should start keeping track of which CID values go to which files so we don't get confused and to make it easier to get the correct CID when we need it. To make this easy, create a text document somewhere (in the same location as your python script if you want). We will use this text file to keep track of your CID URLs. I named my text file "Meowsies_IPFS_CIDs.txt". Paste the CID URL you just copied for your unrevealed image into this text file and label it "unrevealed image CID (single image)" that way you remember this is a CID to a single image file. Here is what my file looks like...
Now, go back into our python script and paste that unrevealed image CID URL value into the image location for both our regular (real) metadata and our "unrevealed" metadata. It will look funny and you likely have never seen a URL like this "ipfs://xxxxxxxxxx" but that is valid and any program that uses NFTs will know how to figure out what to do with that. For our "real" metadata file, you will want to also include the actual image file name in the image URL. This doesn't really make sense now, but you'll see why/how this works in a later step (when you upload all your final images). For now, just include code to add the image file name after the unrevealed image CID URL just like if the CID was a folder and now you need to specify the filename in that folder. The actual image file name to use, you can see in the line above is just the token number plus .png (example: 23.png ). This isn't really valid right now, but when we do our find/replace as described in step #4 above, it will make more sense. For our unrevealed metadata, you don't need the filename because this CID actually points to the unrevealed image itself, so no file name is needed.

If you run your script again now, you should see that it populates the metadata with this image URL populated in both the "real" metadata files and the "unrevealed" metadata files (but the "real metadata files will include a filename after the CID value and that is correct for now). You know what? We are pretty much done with our script and we can run it when we want and generate all of our NFTs and all the metadata files. First....I repeat, FIRST, make a backup copy of your script and any other code files you have. The last thing you want to do is run your script to generate 10,000 images and it gets stuck and you have to shut off your computer and you maybe lose some work. So, first make some backup copies of your script, your images, and any other important files. Save them onto another computer, onto a thumb drive, zip them all up and email them to yourself, whatever you need to do to make sure you won't lose them if your computer crashes. Now that you have everything backed up, go for it....set your loop to generate 1,000. If that works fine, then go for the entire 10,000 (or whatever your collection size is).
Once you have run your script for your entire set of NFTs (all 1,000 or 10,000 or however many you make), you have completed step #1 and #2 in our 5 steps directly above. Now, we can do step #3 "upload our image files and get our CID value". To do this correctly, we will be uploading a directory of images and IPFS will create a CID for that entire directory. This will allow us to use the CID value just like it is a folder, and then it keeps the filenames intact. So we can reference a specific file using the CID and filename just like we reference it in a normal folder. So, lets upload our entire final images folder into nft.storage, and that will give us a CID value that we can use like a folder name in IPFS and then we can reference the individual files in that folder by the filename. To upload a folder into nft.storage website, you need to download the "NFTUp" program on their site. This is a safe program. Go to your nft.storage page and on the "Files" section, click the "Upload directories easily with NFTUp" button.
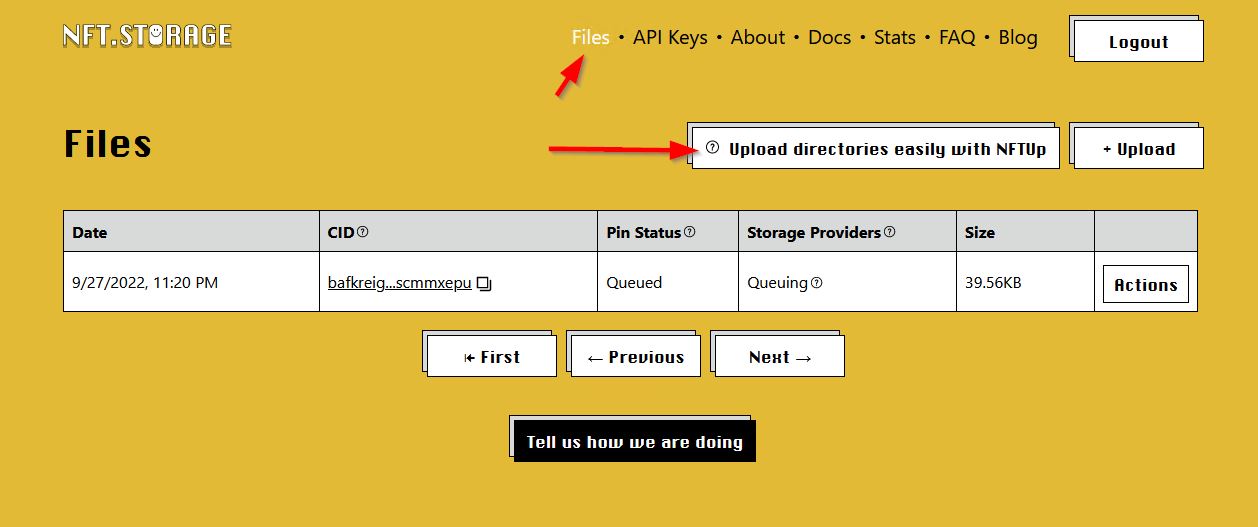
After you download and run the program, choose the folder to upload (choose your final image file folder). It will then ask for your API key. You can find that back in the nft.storage site by clicking the "API Keys" link. Then click "New Key" to create a new key (it will ask for a name, but the name is not important and you can name it whatever you want). Click the "Actions" button and then the "Copy" button to copy the key to your clipboard. Then go back to your NFTUp program and paste it into the box to let you upload your image directory.
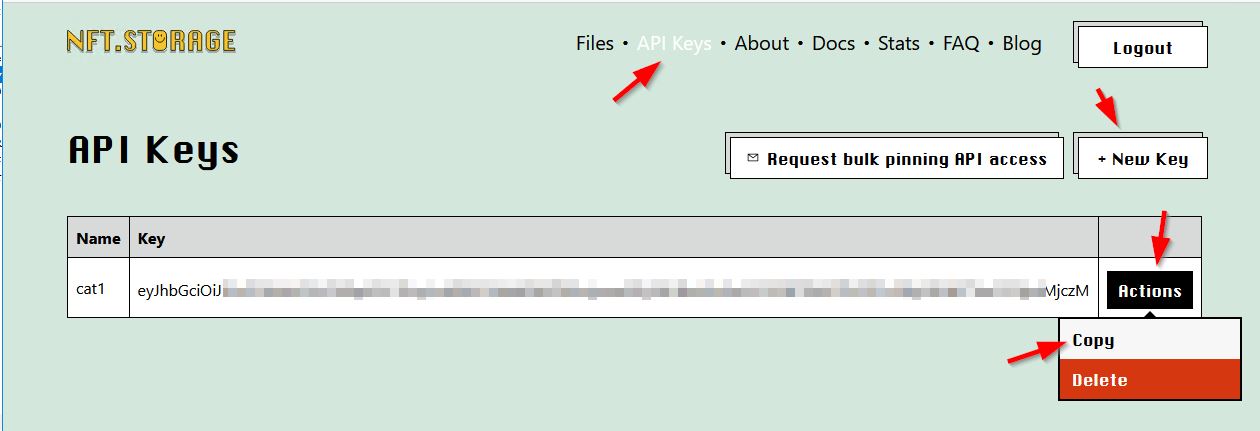
After it finishes the upload, it will give you your CID values, we want to again copy the IPFS URL version and you can copy that by clicking the little copy button next to IPFS URL.
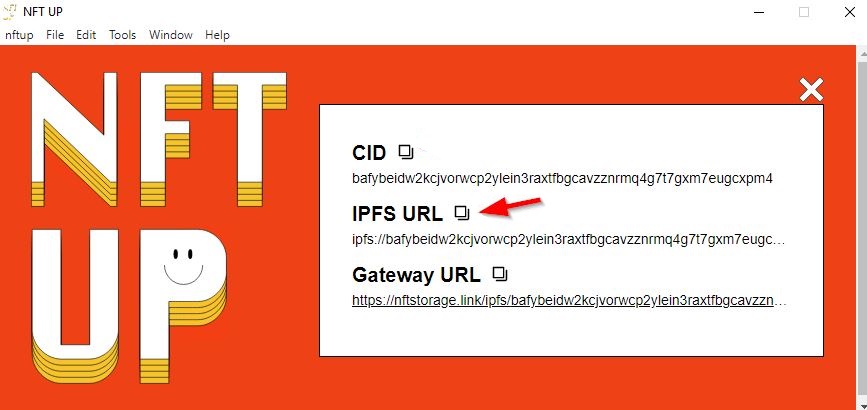
Make another entry in our text file that we are tracking our CID values and paste this in there as "final images CID (directory)". That way we remember it is a directory style CID. Here is what my text file looks like now that has all my CID values I am keeping track of...
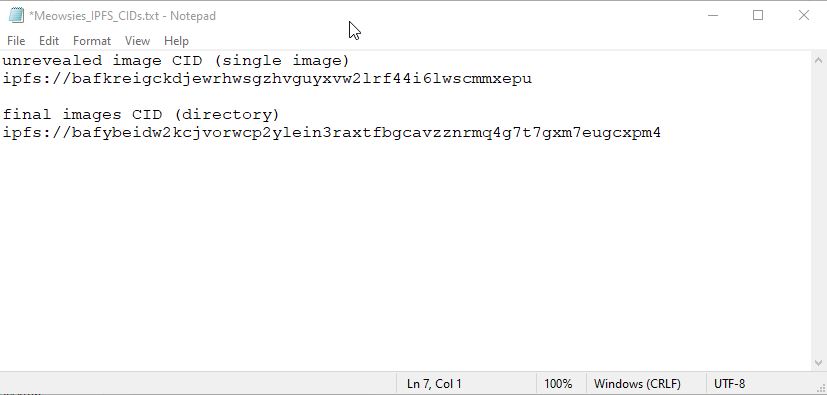
Now we need to do a find/replace in our "real" metadata files to replace the "unrevealed image CID" we used. We will replace that CID with this one we just received by uploading our final images using the NFTUp tool. How you do this will depend on what software you have to do batch find/replace in text files. I use Notepad++ (https://notepad-plus-plus.org/) which allows this very easily. You want to do a find and replace in every one of your "real" metadata files. You want to replace all occurances of the "unrevealed image CID" value with the "final images CID" value. Here is how I do it using Notepad++...
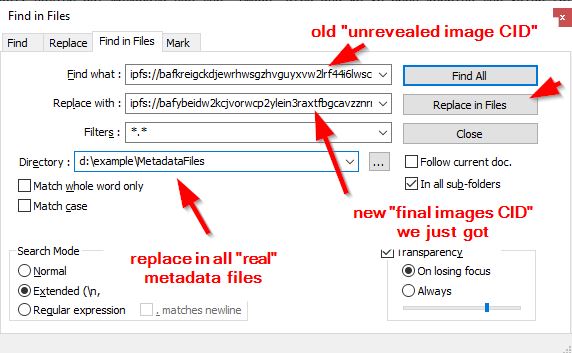
Now that we have all of our "real" metadata files fixed, we can upload those into IPFS. Go back to your NFTUp tool and upload your entire folder of "real" metadata files. Once that is complete, grab the IPFS URL that it gives you and record that in your text file you are keeping track of your CIDs in. Label that one "real metadata CID (directory)". Then upload your entire folder of "unrevealed metadata" files. Once that is complete, grab the IPFS URL and record that in your text file with a name of "unrevealed metadata CID (directory)". Your file with all your CIDs should now look something like this...
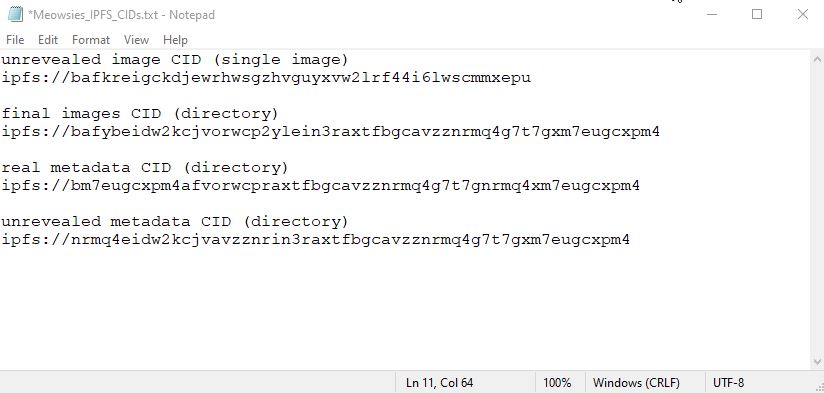
Now we have all of our files uploaded to IPFS and we are good to go to start creating our NFT smart contract.
Code the Smart Contract
The smart contract is code that runs in the blockchain and its basically what makes you be able to mint the nfts and get them. My dad did most of it but he kind of showed me how it worked and it took a while to figure out but then we figured it out.
What is a smart contract? Well, it is basically a script/program that is run inside a blockchain (the ethereum chain in our case) to perform some sort of action. In our case, it will create an NFT for someone. To create this smart contract, we use a programming language called Solidity. There are many tutorials out there explaining the solidity programming language and smart contract creation. One of the best walkthroughs is probably https://cryptozombies.io/
For this tutorial, i will not get into the nitty gritty of smart contract creation, I probably already bored you to death with the python walkthrough. And since you really only need a super basic contract, I will just give you the minimum amount of knowledge and code needed to deploy a very simple (working) smart contract. We will use the Remix IDE for this because it seemed to be the easiest and has plenty of other help documents out there to help you if you run into issues.
I found these tutorials from someone named Web3 Club on youtube to be very good. https://www.youtube.com/channel/UCJbA7dA_YPbnef0vEBFuhKQ There are all sorts of tutorials showing how to add extra functionality to your smart contract. Check them out if you want to get into more advanced topics.
So, let's get right down to it and write and write our smart contract. First, go to the https://remix.ethereum.org website. Once there, click the "Contracts" folder under your workspaces area to highlight that folder. Then click the "new" icon to create a new contract (just ignore all the other contracts in there). Give the new contract a name. In our case here, I am calling it testMeows.sol
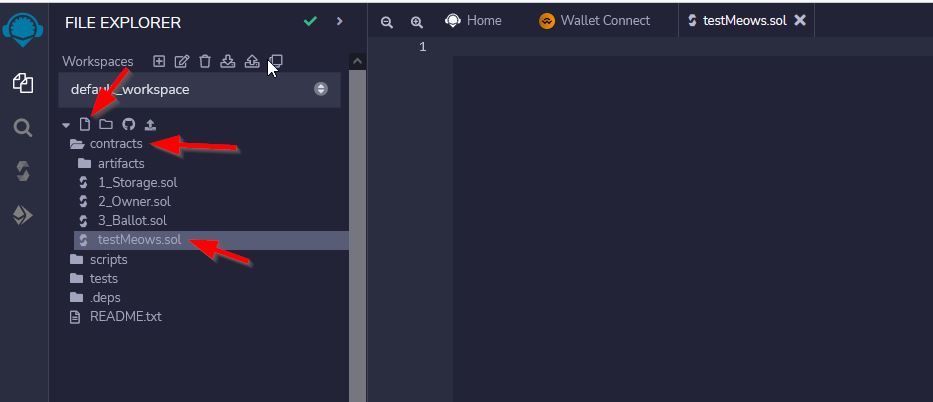
Now, go to our github source files location and open the Meowsies.sol file....https://github.com/meowsiesNFT/Meowsies/blob/main/Meowsies.sol Drag your mouse down to copy the entire contents of the Meowsies.sol file and paste it into the right hand side of this remix window. Your window should look like the following...
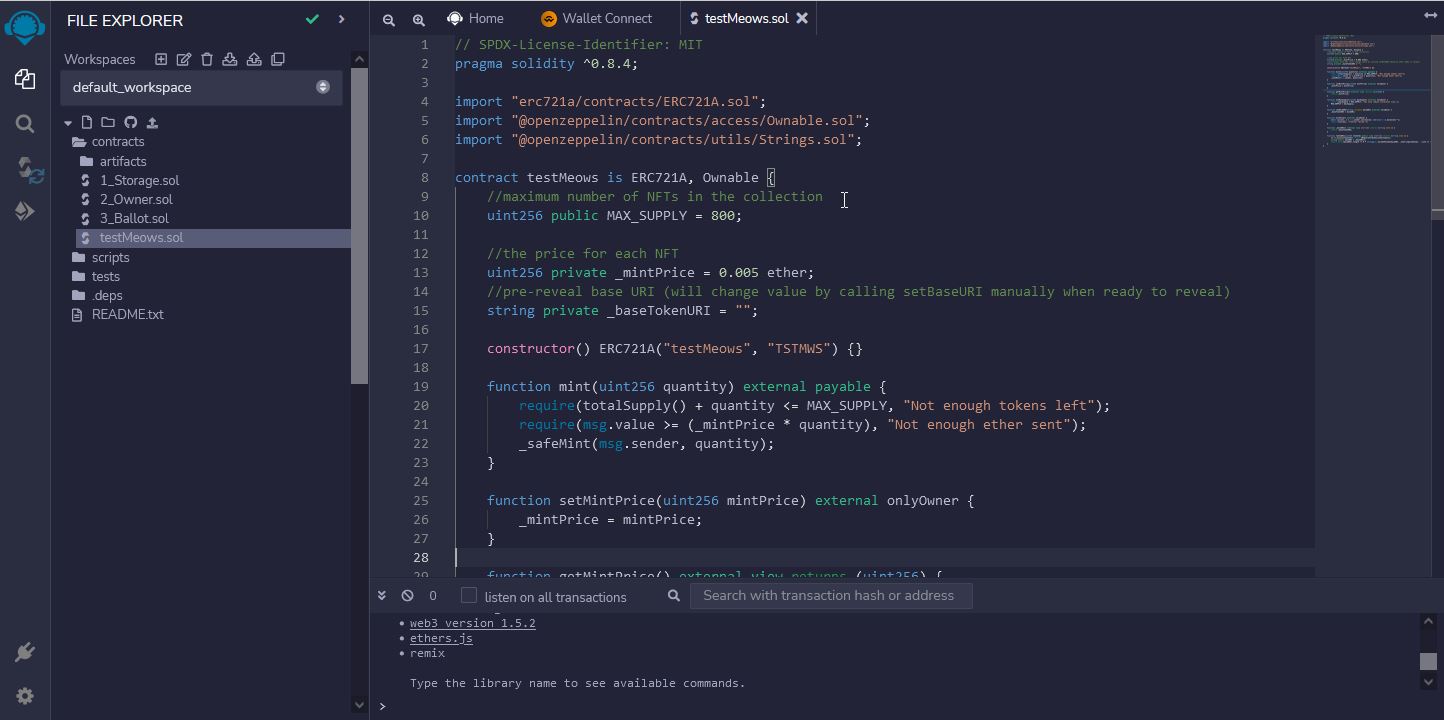
There are really only a couple changes that you will need to make in this file. You will change the contract name, collection size, the price per NFT, the base token URI, the token name, and the token symbol.
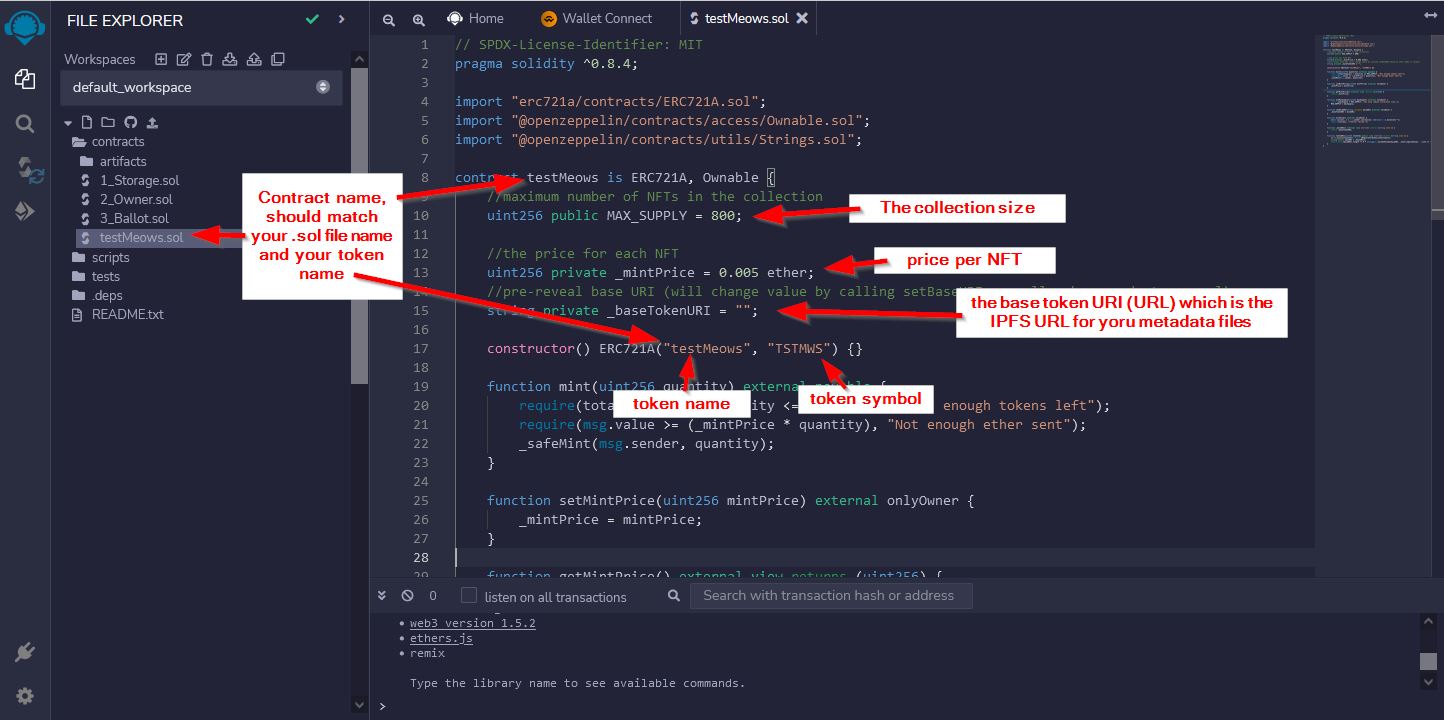
The contract name should match your ".sol" file name and your token name values. Just set them all to be the same. This value can be seen by people so make it a good name. In our final contract, I set the name to simply be "Meowsies"
The collection size is the maximum number of total NFTs that you will have in your collection. The smart contract I created and supplied for you allows you to lower this value in the future in case you need to. Like if you are having trouble selling your full collection and you decide you want to make the collection size smaller. The smart contract code I created will not allow you to increase this size though. So, if you set it smaller and then decide you want the original size back, you will be unable to do that and will be stuck with the smaller size forever. The reason I set the code this way is because it is common practice to not allow your collection size to get bigger. That is sort of considered "shady" or "tricking" your community. They may consider if you increased the size that you are tricking them because their NFT is no longer as rare as they thought it was when they bought it. Reducing size makes their NFT more rare, so they do not normally have a problem with you reducing size.
The price per NFT is just that...how much someone will pay to mint one of your NFTs. If they mint multiple at the same time, they need to pay the multiplier of this (ie. pay twice this value to mint 2 at one time). The contract I wrote allows you to increase or decrease this value at any time. Like if ETH price goes up, and you wanted to keep your NFT set at a certain USD value, you can reduce the price in ETH to account for the ETH->USD price change.
The base token URI is that "metadata CID (directory" value you received when you uploaded your metadata files to IPFS. The smart contract I wrote allows you to change this value at any time. So, if you are using the "reveal" strategy we discussed earlier in this tutorial, then you should set this value now to be the "unrevealed metadata CID (directory)" value we recorded earlier. Then, later, when you are ready to "reveal" your NFTs, you will run a command on the blockchain to change this value to be the "real metadata CID (directory)" value you have.
Token name and token symbol are not really used much. You should set your token name to be a short quick name for your collection, and the token symbol to be a few (uppercase) letters as a shorthand version of your token name. In our final contract, I set our token name to be "Meowsies" and our token symbol to be "MWSYS".
Now that you've made your changes, we can compile our contract. Click the "Solidity Compiler" link on the left side, then expand the "Advanced Configurations" section and put a checkmark in the "Enable optimization" check box. Then click the "Compile XXX.sol" button to compile it. The enable optimization just adds some extra optimizations to help your contract be more streamlined so it will save people money on transaction fees when minting.
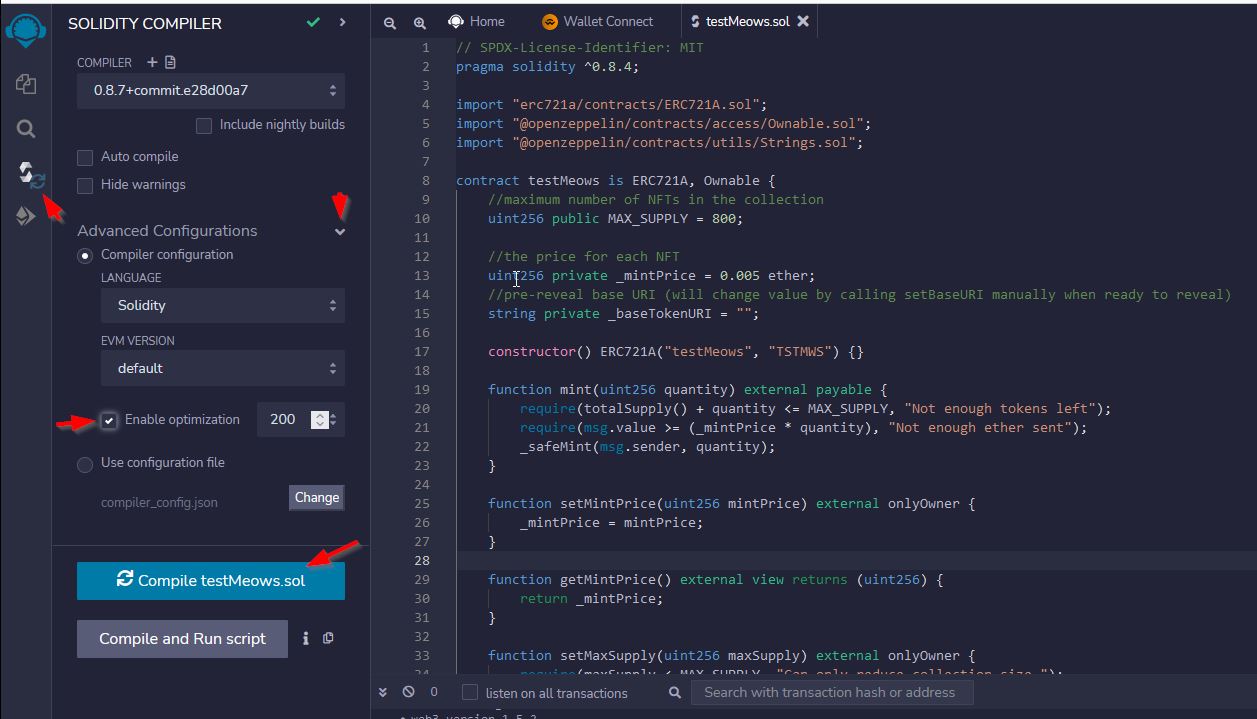
Your contract should compile and you should get a green checkmark icon on the left side of screen...
Now the next few steps are going to require that you have a Metamask wallet installed and have a basic understanding and knowledge of how to interact with it. If not, you may need to search internet for tutorials on how to use metamask. Be careful, there will be many many many scams. If you run into problems, check in our discord and ask for help.
We are going to deploy our contract to the rinkeby test network for ethereum. This will allow us to run a few quick tests on our contract in the test network (using test ethereum) without risking losing real ethereum in the process. The first thing we should to do is create a "test" account in our metamask wallet. This will allow us to do all our testing using a test account and it further reduces the chances we will accidentally do something using our real account that has real ETH on it. In your metamask create a new account and call it "testAccount" or something similar. Now we can go and obtain some testnet ETH on our test account. The rinkeby testnet has a faucet located at https://faucet.rinkeby.io/ Just follow the instructions to create a tweet and put your test account address in the tweet. If you follow the instructions correctly, you should receive some free testnet ETH (on your test account) in a few minutes. If the faucet is not working, you can contact us in discord and likely send you some testnet ETH.
Now that you have some testnet ETH on your test account, we can go ahead and deploy our contract onto the rinkeby testnet and test it out. First, open your metamask and ensure your wallet is connected to rinkeby testnet, and that your test account is the active account....
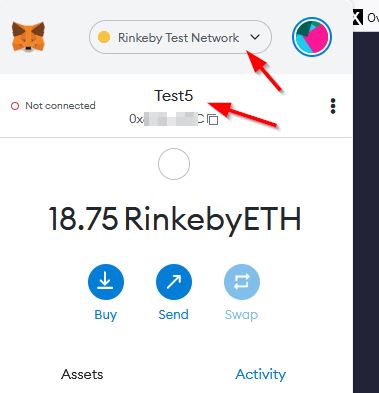
Now, on the left side of your Remix window, click the last icon which is titled "Deploy and Run Transactions". Then change the "environment" dropdown to "Injected Provider - Metamask". This tells remix you want to use the environment specified by your metamask add-in. When you select this item in the dropdown, metamask will pop up and and ask to connect to the site. Find your test account in the list and ensure that is checked, then click next to allow remix to see your address and pop up prompts to initiate transactions. Then in the remix window, ensure the "contract" dropdown is showing your contract you made (called testMeows in our example and in the screenshot below). If that all looks good, then click the "Deploy" button.
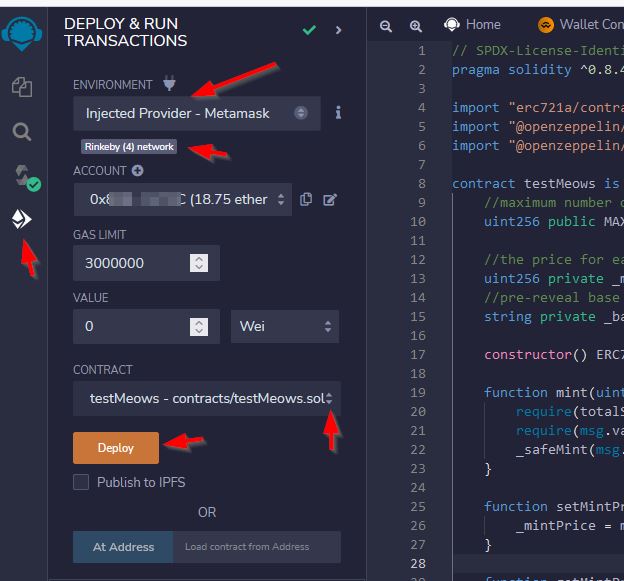
Metamask should pop up a prompt to confirm the transaction to deploy your contract. Ensure the following items in that metamask prompt that appears. These are all showin in the screenshot below. Ensure that the network says "Rinkeby Test Network", your account being used is your test account, and that you are interacting with remix.ethereum.org. If those are all correct, then you can click the "Confirm" button to confirm deploying the contract to the rinkeby testnet.
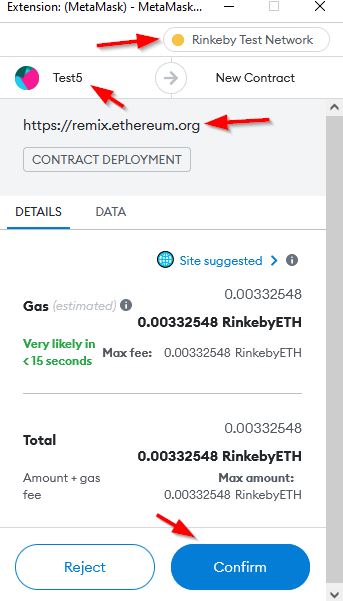
Once the transaction is confirmed (should take less than 20 or 30 seconds), you will receive a metamask popup (usually in the bottom right corner of your screen) telling you the transaction is complete. Now, you should see your contract listed at the bottom in the "Deployed Contracts" section.
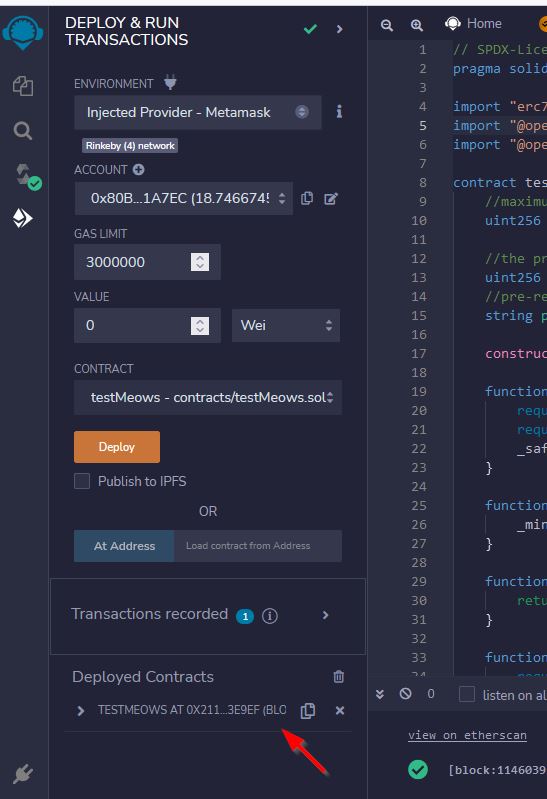
Click the little expander arrow next to your deployed contract and you can see all the functions listed that you can execute on your contract. All the functions to "write" to the blockchain are in red and orange. All the functions to "read" from the blockchain are in blue. First, let's test reading the contract to find out how much our NFT costs. Click the blue button for "getMintPrice" (the button may chop off part of the button label because it is too long, but you'll be able to find it). It will return the cost of your NFT listed in WEI. This is the smallest unit of ETH. ETH has 18 digits, so 1 WEI is .000000000000000001 ETH. Our price is listed as 5000000000000000 WEI, which is .005 ETH. Just like we coded it in our contract. If you need a quick way to convert between WEI or ETH, I use this website https://eth-converter.com/
Now, let's do a bunch of tests to make sure our contract works correctly. Let's start by testing our mint function. First, highlight your price value you see (the 500000000000000 ) and and right-click it and choose "copy" to copy that value to your clipboard. We'll use that value in a second, so best to just grab it real quick. Now, scroll up to the "Mint" area and put a "1" into the box...we will mint 1 NFT (don't click the button yet though). Then scroll all the way to the top and put your amount of ETH to send when you mint. Unfortunately this Remix interface does not allow you to enter decimal places into the value box, so paste the value in your clipboard (the 5000000000000000) and change the currency to WEI. This is the amount of ETH you are sending to the mint function. If you send less than the required amount, you will get an error and a failed transaction (you can try that later if you want to see what it does). Our contract is however coded to allow you to send more ETH that required, so if you send extra ETH, it will allow it and have no problems...it just thinks you sent the project a "tip" or "bonus". Now, scroll down and click the "mint" button to initiate the mint function.
Metamask will pop up a prompt to confirm the transaction. Again, verify it is connected to Rinkeby test network, you are connected to your test account, you are interacting with remix.ethereum.org, the value being sent is the correct amount to mint. If all looks good, then click the "Confirm" button.
Once it confirms, you should see a prompt to indicate it confirmed. Now scroll all the way down to the button for "totalSupply". Click that button and it will return the total supply (the number minted). It should say "1" because you just minted the first one.
Now scroll back up and try to mint 10 NFTs. So put a 10 in the "Mint" box. Then paste your mint price into the "value" box, but add an extra zero (you are minting 10). Then click the mint button. Verify in the metamask prompt that everything looks good (all test account and test network, etc). And confirm the transaction. Once it completes, then scroll back down and check your NFT supply now...it should say 11. Mint a few more if you want (make sure the value of ETH you send each time is correct), and verify the count looks good each time. We have confirmed our mint function, so that is good.
Test the withdraw function. Now that we have minted a few NFTs, our contract will contain ETH...all the ETH that we have sent to it to mint our NFTs...we should test withdrawing that ETH (always test your withdraw function....if your withdraw function does not work, all the ETH that people send to your contract will forever be locked in it, and no one can EVER get it back out. So, open your metamask and check your current amount of ETH in your wallet....record that amount somewhere so you remember what it is. Now, go back to remix, and scroll down to the "Withdraw" button and click it. Verify the metamask prompt looks good and click the confirm button to initiate the withdraw. After it succeeds, open your metamask again and verify your balance has increased by the correct amount (it should be your mint price multiplied by your current supply). If your balance updated corretly, then your withdraw function should be good. But, there is one more test you should probably do in regards to your withdraw function. You should test that only you can run that function...you don't want just anyone to be able to withdraw your funds. The withdraw function itself is coded to only allow the contract "owner" to be able to initiate it. The contract "owner" is the account that deployed this contract to the blockchain. It is the account you were connected to remid with when you clicked that "Deploy" button a few steps ago (it should be your test account you created in metamask). So, to test this out, change your metamask account to a different account than your test account. When you do this, it should ask if you want to connect to remix with this other account. You do. Once connected, click the "withdraw" button again. It should display a warning message about "gas estimation failed". This is the generic blockchain error when the code knows it will fail. It does let you cancel the transaction or ignore the warning and send it. If you choose to send it, it should fail. So, only the "owner" can withdraw from the contract. There are a couple functions only the owner of the contract can run, so it's important when you do actually deploy your final contract to the ethereum mainnet, you deploy it using a good address that you will keep and not lose access to. If you lose access to the owner account, your contract will become stuck at all the current values and balance of the ETH in the contract will be stuck and not accessible. There is a function to "transferOwnership" to another account if you really need to do that in the future. But, to transfer ownership to someone else, you will still need access to the current owner account...so do not lose access to your owner account.
Test the setMintPrice function. There is a function to change the mint price (the button is titled "setMintPrice". Change it to a different value (remember the unit is WEI, so use the ETH to WEI converter app if you need help calculating it). After changing the mint price, use the function to "getMintPrice" to verify it has the new price. Then test minting an NFT with that new price. Test minting an NFT with an amount that is lower than the price and verify it fails.
Test the setMaxSupply function. There is a function to change the max supply of your collection. First try changing the collection size to a larger value..it should fail. To verify it really failed, use the button titled "MAX_SUPPLY" to see the current max supply...make sure it didn't really change the max supply. Now, try changing the size to a smaller value. It should succeed. Check it actually worked by clicking the button for "MAX_SUPPLY" and confirm the new value is actually being used.
Now, we should test to ensure our new max supply value is really being adheared to. Change the max supply to something just 2 or 3 more than your current supply you have already minted. Then try to mint a bunch more NFTs that would put you over the amount of max supply. Verify it fails to mint more than it should.
Test the setBaseURI function. This function allows you to set the location of your metadata. You probably set it to be the location of your "unrevealed" metadata earlier before you deployed your contract. You can check the current value by clicking the button titled "tokenURI" This button actually returns the tokenURI, which is the baseURI plus the token ID value at the end. So, you will have to specify the token number before you click this button. Check the tokenURI for a couple tokens and make sure it looks like what you coded earier. Now, use the "setBaseURI" function to set your value to a different value...you can set it to the location of your real metadata if you want, but sneaky people out there may be able to see that you did this during testing and will figure out your real value...so I suggest you test setting it to some fake URI value. Then click the "tokenURI" button again to verify it really updated your baseURI. If all looks good, then set your baseURI back to your original "unrevealed" URI because we want it to be a valid value for one of our last tests.
We have completed testing our smart contract. If you added additional functionality to your contract, ensure you test it all before considering your contract good to be deployed to the ETH mainnet.
Now we can test that our metadata and image files are good. To do this, we simply open up a rinkeby testnet version of a marketplace and see if the marketplace can display our metadata and images. Opensea has a testnet on rinkeby, and looksrare also does. The looksrare testnet seems to perform better, so let's use that. There are reports that the entire rinkeby testnet itself will be decommisioned by the ethereum developers and will not migrate/upgrade it further since the ethereum merge. If that happens, these testnet activities described above will need to be updated...but until one of the NFT marketplaces come up with a functioning test versions on one of the other testnets, i'm going to keep using rinkeby. If things change, I will update the instructions and screenshots above. For now...let's go to looksrare testnet at https://rinkeby.looksrare.org/
Once you go there, connect your test account (and make sure you are still connected to rinkeby testnet in your metamask) and then check out the NFTs on your address. You should see all the NFTs you minted. The images should be the "unrevealed" image you uploaded earlier, but each NFT should have a name that includes their token ID. If that looks good, then you can consider your contract code as complete.
Now, you should do one final check over all your source code to ensure there is absolutely no private information in the smart contract. You will be publishing your smart contract source code so everyone can read it. So, make sure you DO NOT have any personal info or private keys or anything that you do not want anyone in the world to see (forever). Once you deploy a smart contract, you cannot modify it, so you do not want to deploy it with personal or private info in it. Once you are absolutely sure your code is good and there is no personal info that you don't want the entire world to see, then it is a good time to make a final backup copy of the code. In the remix window, just select all the code of your contract and paste it into a file on your computer somewhere...this is making a backup of your contract so you can deploy it at a future date or so you can use it in the future for whatever purpose. You should not rely on remix to store the contract source code for you, you should make your own copies of it for backup purposes.
Deploy the Smart Contract
When your code is done you can send your code to the ethereum blockchain for everyone to use and create your NFTs.
Now that your code is complete and you have backups, it is technically ready to deploy to ethereum mainnet. But, you don't have to deploy it right now, you can wait until later after you have created your website, your discord, and have done some marketing. The reason you may want to wait a bit is because there is no code in your contract to allow you to stop or pause minting. So, make sure you only deploy the contract when you are truly ready for people to mint...once you deploy it, you have no way to stop people from minting. Whenever you are ready to deploy it to mainnet, the steps will be just the same as you did to deploy it to testnet. Just go back to remix, change your metamask to use ethereum mainnet instead of rinkeby, change your address that is connected to remix to an appropriate address that you want to be owner of your NFT contract (remember, only the owner can withdraw funds out of the contract and make changes like to the baseURI or the price). For your owner account, I would create a brand new account in metamask and call it "MeowsiesOwner" or something like that. Then connect that address in remix, and deploy your contract to the ethereum mainnet. Make sure you have good backups of your metamask wallet seed phrase to ensure you never lose access to this account.
Immediately after you do deploy your contract to ethereum mainnet, you should do 2 final tests to ensure it is working correctly. You should mint the first NFT and go check it out on opensea or looksrare marketplace (check it on the real live opensea/looksrare, not the testnet....remember you just deployed to real production ethereum). If it looks good, then you can do the final test...test the withdraw function to withdraw the funds from your contract. My mantra is test, test, test....especially for a function as critical as withdrawing the funds. Always test things yourself and test any other required parts of that thing before you announce to people that it works, that will save you from looking stupid one day when something isn't working and you already told everyone to go use it. It is always better to be safe than sorry. So, after you minted the first NFT in mainnet, then go and test that you can withdraw the funds you just sent when minting your NFT. In remix, click the withdraw function and verify the funds made it back to your wallet.
We now have a deployed contract and we know it works to mint an NFT and to withdraw funds. We only have a couple more housekeeping items before we can move on to coding our website to let people mint the NFT. We need to grab the "ABI" code of our contract. "ABI" stands for "application binary interface". This code will allow our website to interact with our contract and be able to mint an NFT. Don't worry, you don't need to know exactly what this means right now. After we get that, we will also verify and publish our source code (but that is described in the next section). For onw, let's grab the ABI code. To do that, go into Remix, and go to the "Solidity Compiler" tab. Then make sure your contract is the one you just deployed to ethereum mainnet, and click the "ABI" button at the bottom.
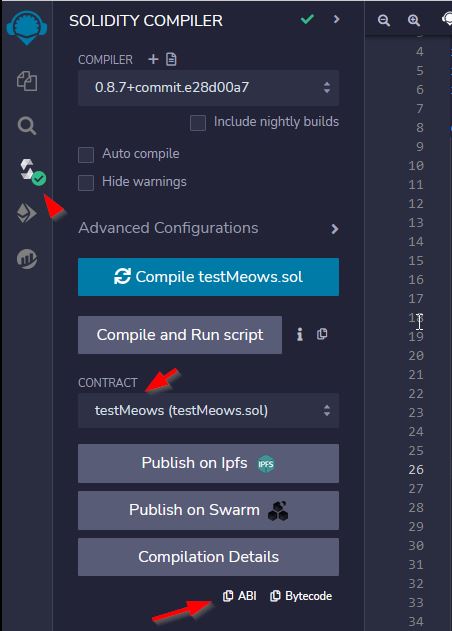
This copies the ABI code into your clipboard. Now open a new text document and paste the code into it. It will be a very long string of json data, and you don't need to know what it is yet. Just save that document with the rest of the files you are saving for backup purposes, and name the file "contract_ABI_code.txt" or something similar.
It is also a good time to grab your "contract address" since we have the screen up and we may need handy access to this value. The "contract address" is the ethereum address that your contract was deployed to. This is different than the "owner address" that you used to deploy the contract. The "owner address" is your address that you were connected with in metamask when you deployed the contract. The contract was created on a new address in the ethereum blockchain. That new address is called the "contract address". To get that, you go back into Remix, and on the Deploy and Run Transactions tab, there is a little copy icon next to your deployed contract. Click that copy icon and that will save the address to your clipboard. Now create a new text file and name it "deployed_contract_address.txt" or something like that. Paste the address in there and that's all you need. It is just a handy way to get to our contract adress (which you will find out later, you may need easy access to quite often).
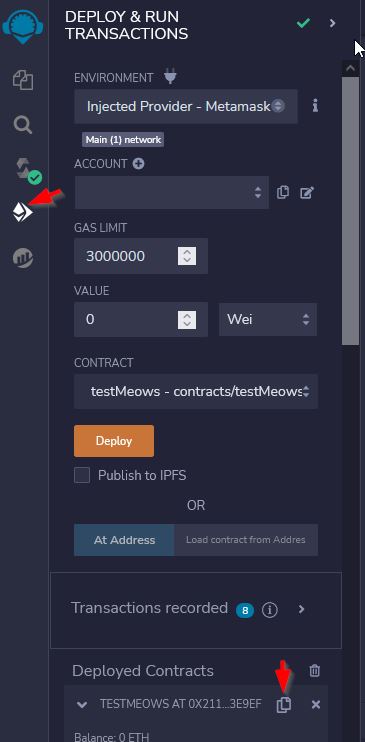
Now, before you close remix, go to the next section below and let's get your contract source code verified and published.
Verify and Publish the Smart Contract
Verifying and publishing the contract is pretty important because it helps people know that buying your nft isnt going to take all the persons money. For example, if the smart contract said that when someone buys your nft, it takes all the money out of your wallet, then buying the nft that they said was about 10 dollars really cost you a thousand dollars. So publishing the contract proves to them that if they buy your nft then it won't take all their money because they can see all the code.
One extra step that really should be done by anyone deploying a contract is verifying and publishing your contract on etherscan. This step is technically optional, but if you don't do it there is a good chance that many people will be hesitant to mint your NFT. Verifying and publishing your smart contract allows people to see your actual source code used to create the smart contract, and that allows them to read it and validate if your smart contract is malicious or not. Right after you deploy your contract to the ethereum mainnet, you should come here to verify and publish it, it is much easier to do right after you deployed. To get your contract verfied and published, we'll use a special plugin in Remix. In your Remix window, click the "Plugin Manager" link on the left side, then search for "Etherscan - Contract Verification" and then "Activate" the plug in.
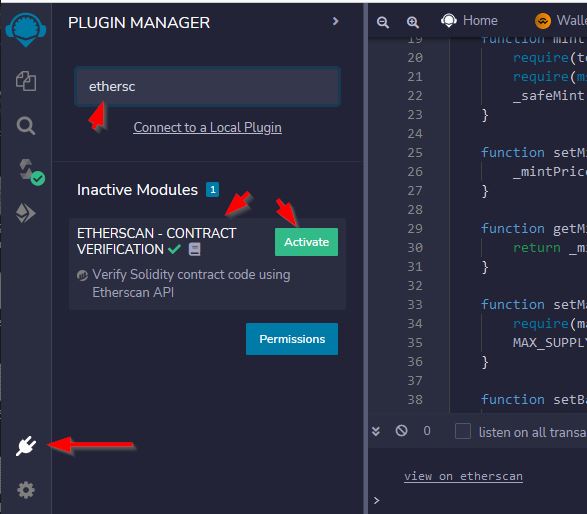
Now, you need to create an account on etherscan.io Etherscan is the most popular ethereum block explorer. It allows people to view all the details of addresses, contracts, transactions, or tokens on the ethereum block chain. You'll learn more about it later, but for now, go there and create an account. As described in many previous steps in our process above, I recommend using your "business" email address for this, not your personal email. Once you've created an account, go to your profile page and find the link to create a new API key in etherscan. Create the API key with whatever name you want. Then click the little button to copy the API key into your clipboard. Now, go back to your Remix window and paste the API key into the new plugin you just installed. Then click the "Save API Key" button. (after you click the button, nothing really happens...just click the button and it saves it, and you can move on to the next step)
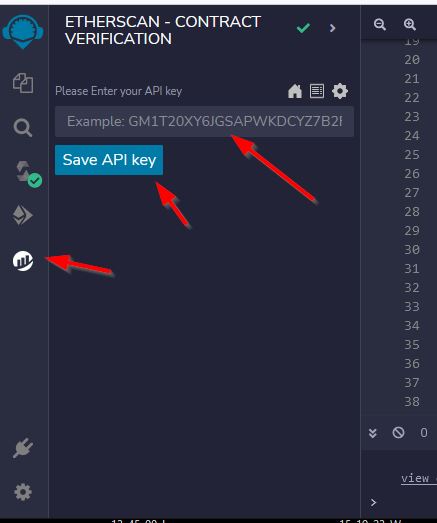
Now, go back to the "Deploy & run transactions" tab in remix, and click the little copy icon next to your contract. This will copy the contract address to your clipboard. (you'll need this in the next step)
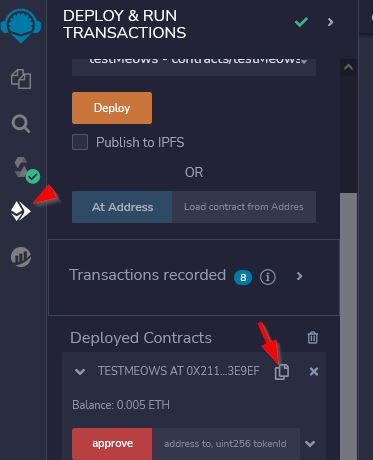
Now, go back to your "Etherscan - etherscan verification" plugin. Click the little "home" icon for this plugin. Then ensure your contract is chosen in the "Contract" dropdown. Leave the "Constructor Arguments" box blank (we didn't use any constructor arguments in the contract we wrote). Then paste the "Contract Address" you just copied to your clipboard in the prior step. Now, click the "Verify Contract" button. You should get a "contract verified correctly" message on the screen.
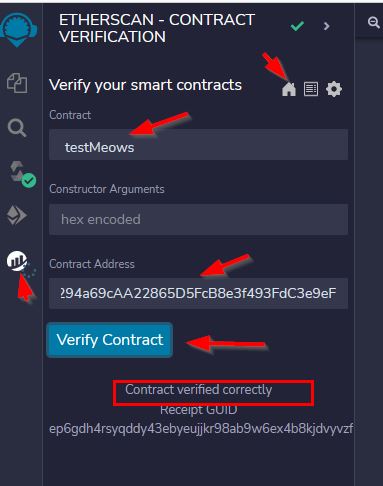
Now, we can go to etherscan to check to make sure everything looks good there. If you deployed to mainnet ethereum, then you will go to the production etherscan at etherscan.io But, if you deployed to rinkeby testnet, you will go the rinkeby testnet of etherscan at rinkeby.etherscan.io Once you get there, paste your contract address into the search bar. It should bring you to a page that shows all sorts of info about your contract address. It has the balance in the contract, the name of the token, and a tab you can click to see your source code. This is great, anyone can read your source code to verify your code and trust that you did not add any malicious code into it.
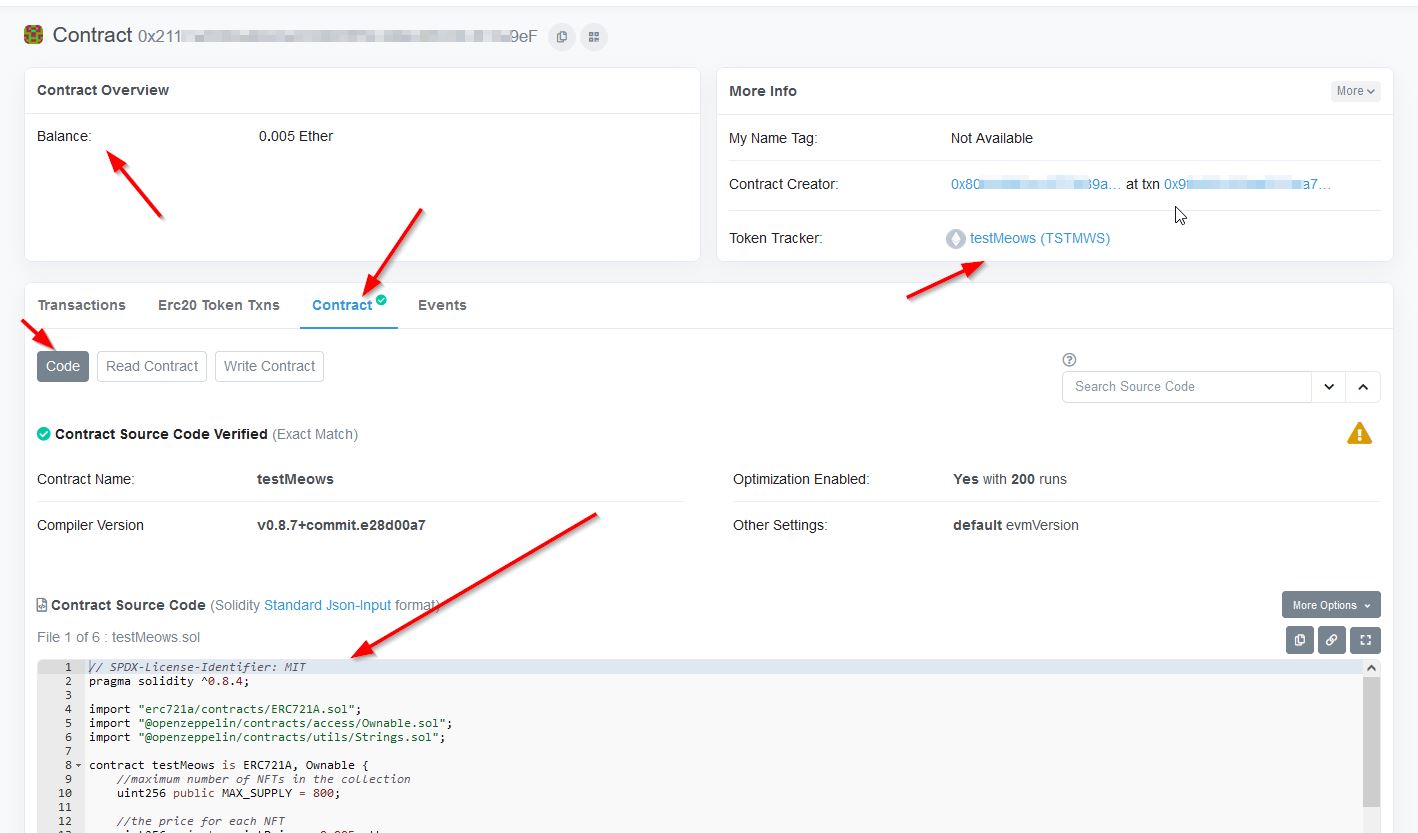
One other super awesome ability, is etherscan will let you run any of your read or write functions of your contract right from this page. You don't need to use Remix anymore, you can just come here to see all your info you need about your contract. Or you can change values like the mint price, the collections size, the base URI...or you can withdraw your funds. To do any of the "write" functions, you will need to connect your owner address in metamask to etherscan. There is a "Connect to Web3" button there and after you click that and connect, you can perform any of the write functions just like you did in Remix.
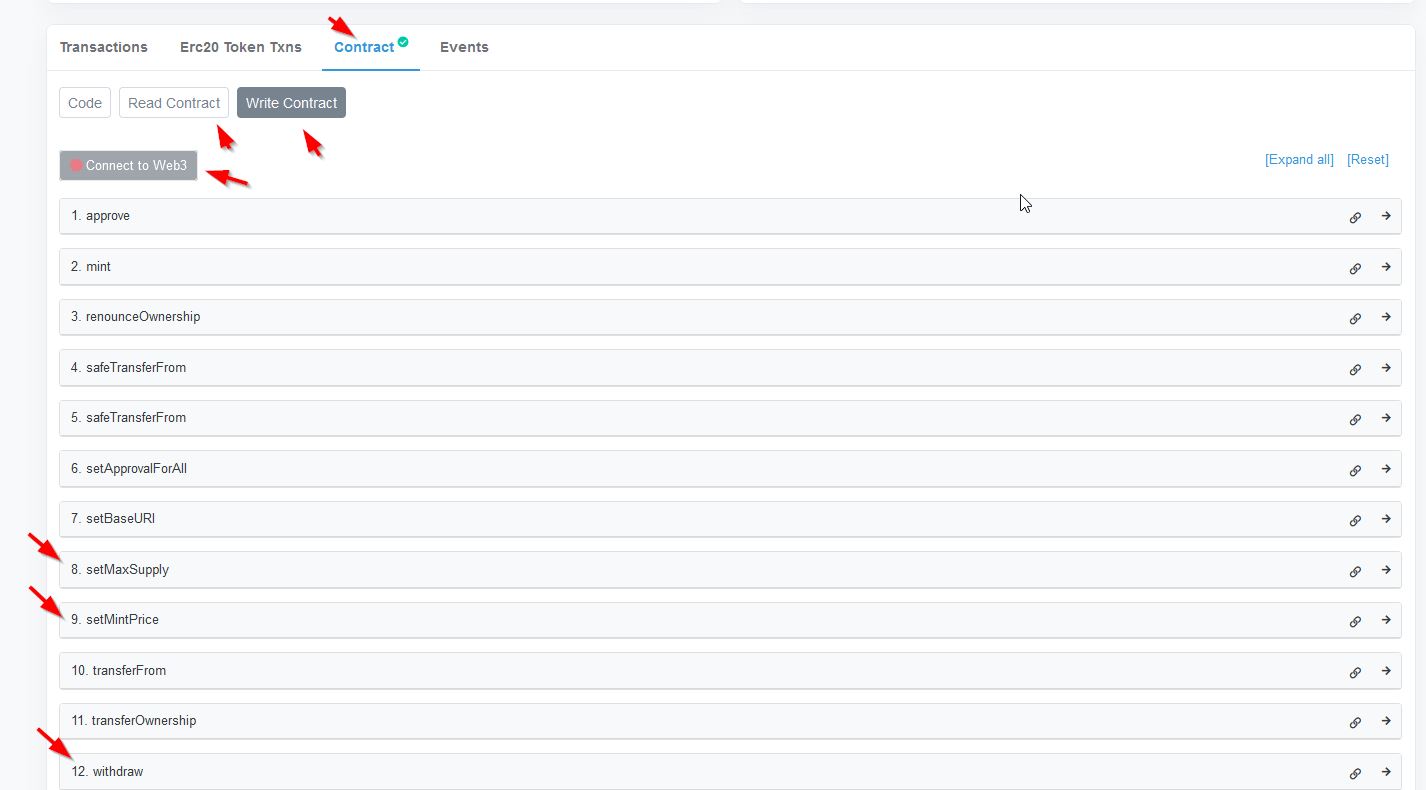
Now your code is deployed, tested, verified, and published. Now you can focus on your website, discord, and marketing strategies...so let's get to it.
Plan the website
Of course, next, you have to have a website. Not only just to look cool but because it helps with marketing and also teaching people what this project is about. My dad said to make a good website. We needed a domains and hosting providers, but i dont understand that part too good. We have to plan the website and try to find out what our website was going to look like. First we figured out what information we needed on the site. Then we went to a few other websites to try and get some ideas on what ours should look like because most websites have sort of the same layout. Then me and my dad tried to find different templates for the website because that would make everything a lot easier because coding websites is really hard.
First it helps to understand the main parts of a website. A website is 2 main parts. There is the website name, and the website content itself. These are 2 different parts you need to create to have a website. The website name is known as the "domain name". As an example, our website is "https://meowsies.xyz". The "domain name" is the "meowsies.xyz" part. You have to purchase this name, and that is called "domain name registration". You purchase and register the domain to yourself. Then you need to set that name to point to your actual website files. Your website files are stored on a "hosting provider". These people "host" your website. They store the website files so when someone types your website name into their browser, their browser will find the files out on the internet and show you the website. Many times it is easiest to "register" your domain and "host" your website at the same company. That makes it much easier for you and you don't need to understand how the 2 parts are set up to actually work and show you a website. But, when you are looking for making a website, you will see these 2 parts referenced differently. Your domain name is "registered" but your website files are "hosted". Getting into who and where to register your name or host your files is a topic that is too much for our tutorial, so i'll let you choose where you do this. A common place to do this is godaddy.com but i've never used them so cannot comment on how good they are. The place I use (ionos.com) is sort of built more for technical people, so I'm not sure I would recommend them necessarily. You should ask around your friends to see if they have any experience or comments on this. Or ask in our discord server also and I'm sure someone (if not me) will discuss it with you.
Ok, now that technical stuff is out of the way, how do we plan our website? I suggest you first write down all the types of information you plan to show on your website. List out anything that you think would help people understand who you are or what your project is about. Then once you know what information you want on your website, you can think of ways to group that information into easy to navigate or easy to find formats. Go look around at other people's websites and see how they group their information. Find examples of what you think make it easy to find the same types of information that you are going to provide to the people coming to your website. Once you know what you want to display and some rough ideas of how you want your website laid out, then you can move on to the step of how to actually code it.
Code the Site
Then we had to code the website. My dad was originally just going to use a template builder website to help use so it would be super easy. But they make it so we can't have our website name how we want and it would be something like wix.com/meowsies or similar and that would have looked not very good. So we just decided to use a simple website template and modify it a little and the site my dad found was really helpful.
Coding your website is definately outside the scope of this tutorial. There are many different places you can find to help you with website templates. If you know how to code, you can buy premade templates. If not, you can go to places like wix.com, squarespace.com, godaddy.com. They are all pretty much going to make you pay if you want to use their "free" templates with your own domain name....the free ones will all have their name somewhere in your website URL. So, if you are serious, you should learn to code basic HTML and CSS and then try your hand at a premade template that you upload to your own hosting provider. For our website, we grabbed a basic framework from https://www.w3schools.com/w3css/w3css_templates.asp I chose this one because it has a ton of help and walkthrough information to help my kid learn how to program. So, i figured use one of their templates as way to dive into HTML and CSS. The templates are there and the information how to modify elements is all there and based on CSS, so it is simple and can be coded in your most basic text editor (Notepad++). But if you want to dive into more complex IDEs for coding (even just for coding a website), you may want to look into VSCode from microsoft, which can be found here... https://code.visualstudio.com/
Once you've created your website you do need to add some extra functionality that you likely don't know how to do yet. You need to code a way for people to mint your NFT. We chose to make a completely separate page to do the mint functionality to keep it all in one place and easy to read/look at. But, you can insert all the needed code into your home page or any other page if you wish.
To interact with our smart contract from our webpage, we'll use a javascript library called "web3.js". This is a pure javascript library, so you don't need to have any fancy webservers and should be able to add this functionality to any website you create no matter who is hosting it. All the information about this library can be found at https://web3js.readthedocs.io or you can just search internet for help on web3.js. Let's dive into how to add this functionality to our webpage. All the code you see below for our mint page is in our github repository, the file is called "Sample_Mint_Page.htm"....https://github.com/meowsiesNFT/Meowsies/blob/main/Sample_Mint_Page.htm You you can go there to copy any of the code you see here and not have to type it. Our final mint page that we made is very very similar to the code below...the basic javascript code is the same in our final mint page, but the layout of the elements is a little different to make it look more pretty. So, follow along below using the sample mint page code, and then later when you want to see what we ended up with for our actual mint page you can then find that in our github repository as simply "mint.htm".
First, we need to include the link to the javascript library so our page can use it. Add the script library into the <head> section of your page....
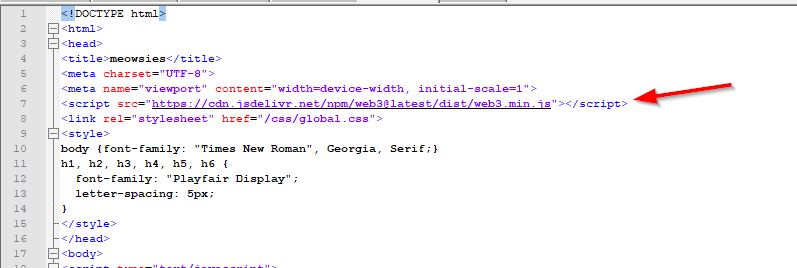
Now, before we add our actual code to do any of our logic to read the contract or mint our NFT, we should make our HTML elements that we will be using in that logic. To make it easy, i added this super simple section of HTML elements. We will use these elements to connect our metamask wallet to our site, see the mint price, see the current supply, see the max supply, specify how many NFTs we want to mint, and to do the actual mint. We will reference all of these elements in our javascript code using the element "ID" values. So if you decide to move these around or format them in your own way, just remember to use appropriate ID values so you can reference them in your code like we do. We set the initial state of all these elements as if the user is not yet connected to our website. Meaning, we have the "connect wallet" button enabled, so the user can connect to our site. And we set the "Mint" button to be disabled, because we don't want them to be able to click it until we know for sure they are connected. We set the initial state of these object to assume the user has not connected their wallet yet....that way when the page loads, we can do quick check to see if the user is actually connected...and if they are, we will change the state of these elements differently...but we want to load the page assuming they have not connected yet.
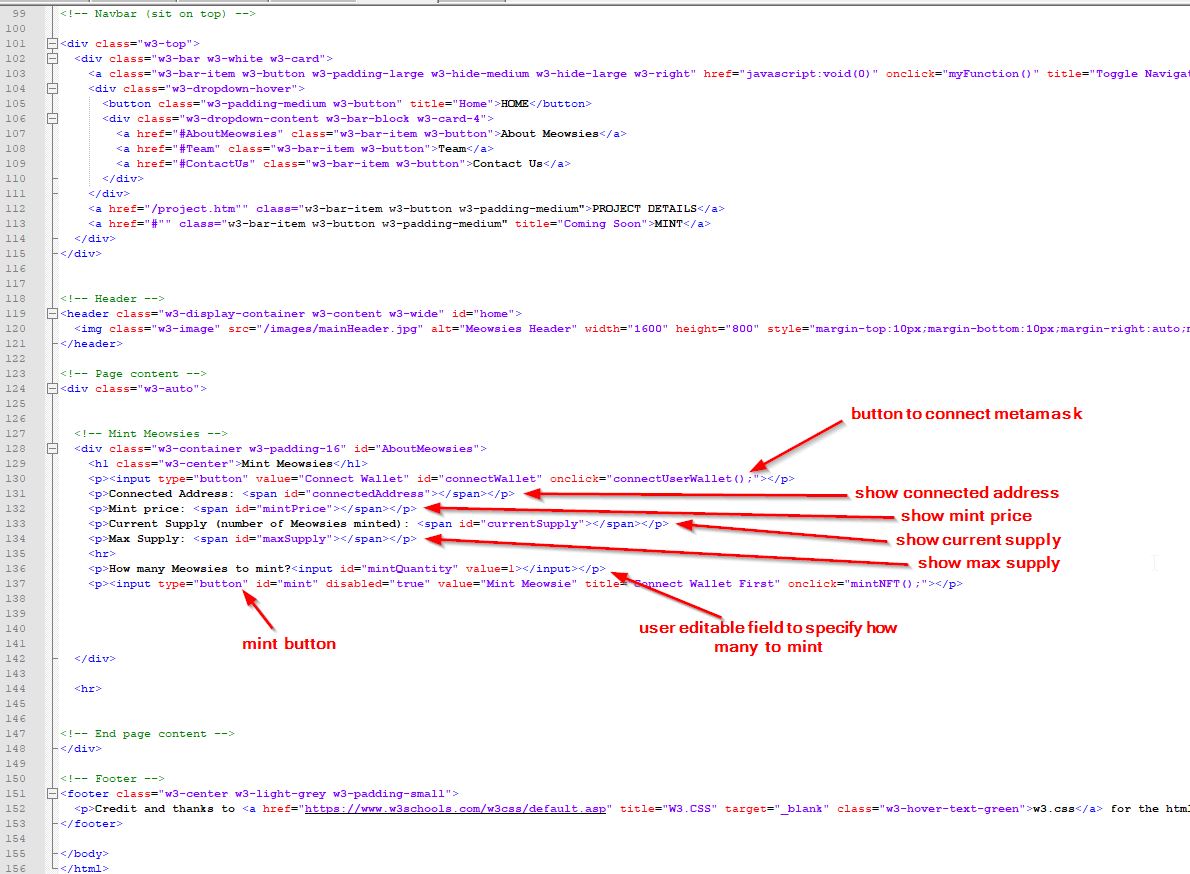
Now, let's dive into all the javascript needed. I created a script block in our HTML for all of our javascript. The first section has the global variables. They are all null (except for CONTRACTADDRESS and ABI and we'll fill those in later). We made all these variables "global variables" by creating them outside all of our functions. That way we can use them in all of our functions. They are "global" because any function can use them. We "initialize" (the initial value) all of our variables to "null" so we can use simple code checks to make sure they are valid before we attempt to use them later in our functions.
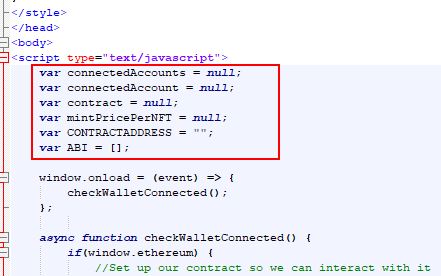
For users to interact with our website and the contract, they must first connect their wallet to our site. This allows our site to use their wallet to interact with the blockchain. It's possible someone has already been to our site and connected their wallet. In that case, we don't want to force them to connect again, as that would be annoying. So, we should first check if they have already connected their wallet to our site before we do anything. We do this by creating a function that is called when the page (window) loads. So, in the "onload" event of the page, we call our function to check if the user has already connected their wallet.
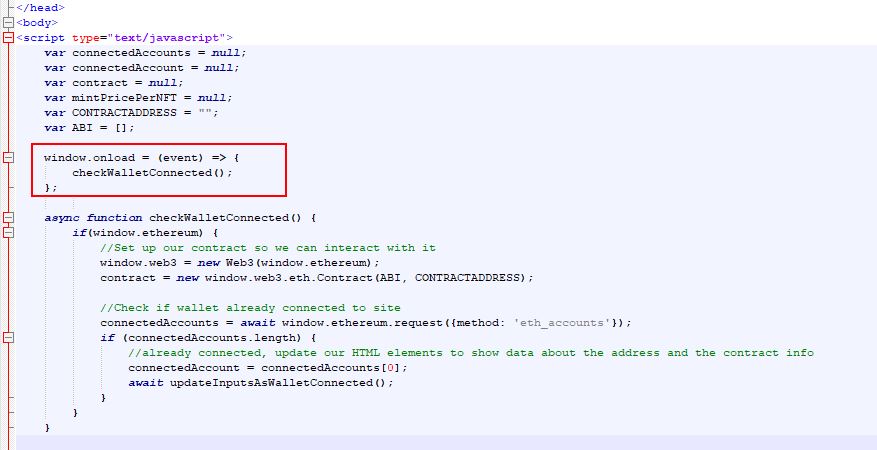
In this "checkWalletConnected()" function, first we check if the user even has a wallet (window.ethereum tells us if they have a wallet installed). If so, then we create a "web3" object and then create a "contract" object from that. The "contract" object is really all we are interested in. This object will let us interact with our smart contract that we deployed.
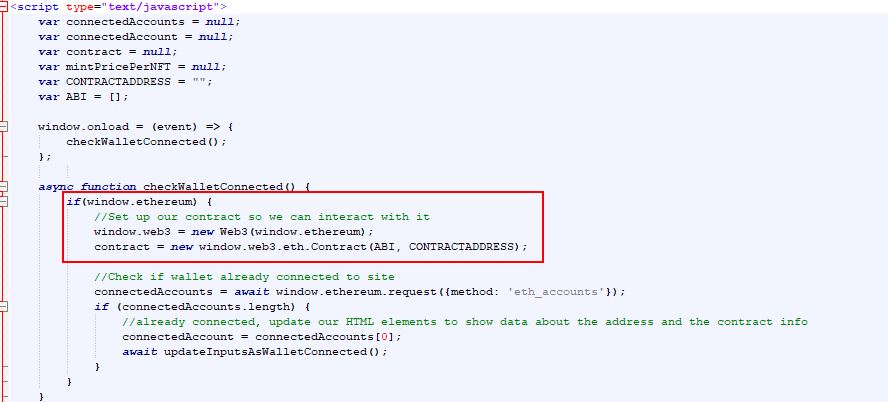
To create this "contract" object and link it to our smart contract, we need 2 items...the ABI code, and the contract address. Remember when we got those from remix? We should have copied those values and saved them in text files. The "contract address" is easy, just put that value into our global variable for CONTRACTADDRESS. The ABI code is a little more complex...and it may help to know what this code does before you get it. This ABI code will help our javacript library "talk" to our contract. It gives the javascript code information about each function in our smart contract so it can correctly craft function calls to make to the smart contract. The ABI code has information about every function of our smart contract. But...we don't really need our javascript to know about every function...only the functions we wil be calling in our code. So...you can if you want, just paste the entire ABI code you got from Remix into our ABI variable. That will work fine...but it is a huge amount of information, and I wanted to keep our code small and clean. So...i only copied the ABI code for the smart contract functions we will be calling. I copied the information for the "mint()", "getMintPrice()", "MAX_SUPPLY()", and "totalSupply()" functions. Those are the only functions of our smart contract that we will call, so I only need to include the ABI code for those functions. You can however paste your entire ABI code from Remix, and that is perfectly fine and valid also. So, copy/paste your contract address and ABI code into the global variables. Make sure to notice that the contract address is a string value and has double quotes around it, but the ABI code is a json object and should simply have square brackets "[]" around it and no quotes around it...
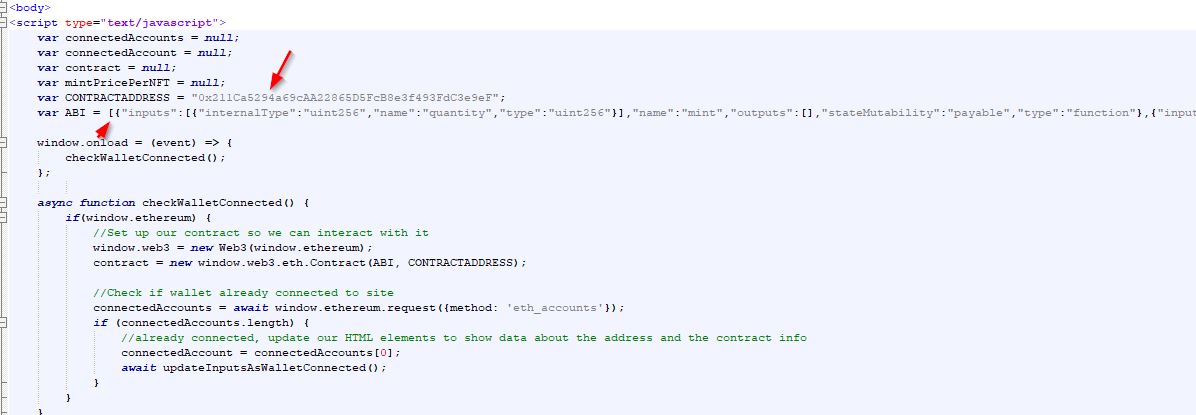
Now that we fixed our code so it can create our contract object, we move to the next section of our "checkWalletConnected" function. We check if the user actually connected any addresses to our website before. If they have, then we populate our global variable to remember which address they connected with, and we update our page to notate that the user has connected their address to our site by calling the "updateInputsAsWalletConnected()" function.
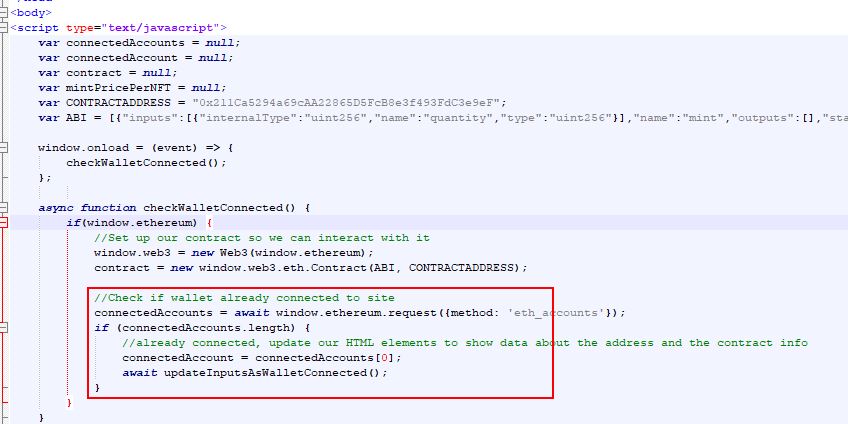
If we look at the "updateInputsAsWalletConnected()" function, we'll see a lot going on. Remember how we loaded the page assuming the user has not connected their address yet? Well, now we now they have connnected their address to our site before, so we can update our elements to reflect that. We show the address they are connected with. We disable the "Connect" button (there is no need for that because they are already connected). We enable the "Mint" button. And then we look up the mint price, current supply, and max supply of our NFT so the user can see this information. All of these actions are commented in the code, but i'll put some red boxes around each area just to make it easier to see...and who doesn't like red boxes?
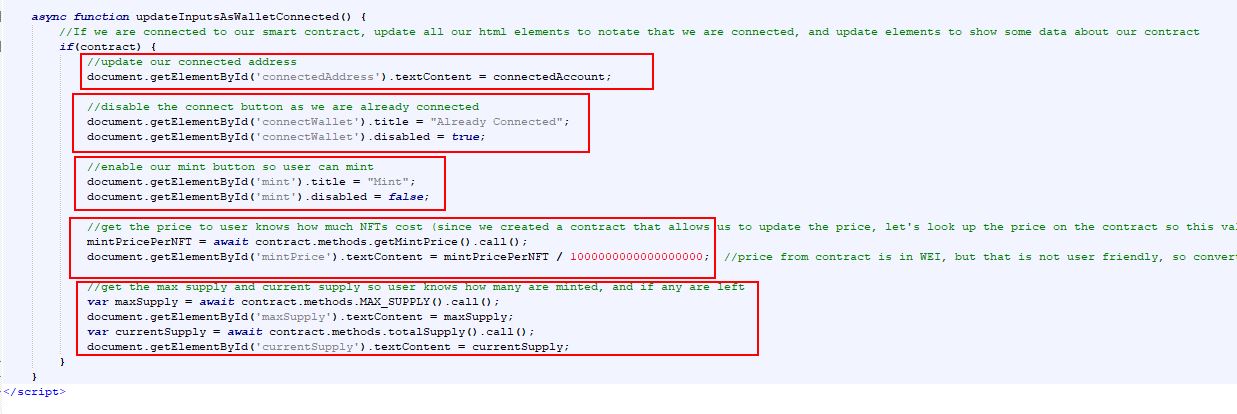
The syntax for calling these functions of the smart contract are all documented on the web3.js website I linked to at the beginning of this section, so I won't get into the details of those. Let's move on to what we do if someone has not connected their address to our site yet. We have our "Connect" button that users can use to connect. When they click that button, it calls the "connectUserWallet()" function. This function will prompt the user to choose and address to connect with and ask them to confirm they really want to connect. Then after they connected, we store the address they connected with in our global variable, and then we call that same function we called earlier to notate the user is connected.

All we have left to code is our mint function. This one is pretty easy. We figure out how many NFTs the user wants to mint, we calculate a total price, and then if everything looks good, we mint it. We reload the page afterwards so the total supply values on screen get updated.

And that should be it. If you have been testing your NFT on a testnet in remix, you can code your webpage to use the test contract address and ABI code, and then connect your wallet to your site (make sure your metamask is still connected to testnet) and you can test minting your NFTs from your website. Then use remix to change your mint price, or your max supply and verify your webpage sees the new values and you can still mint using the new values.
Create a Discord Server
My dad made our discord server with a template he made and that did most of the setup. But first we had to take a look at some other nft discord servers to get ideas on what we should add in ours. We looked at a few and then had an idea of what we wanted so my dad made the discord server.
Discord is currently the most popular social media application for NFT related projects. Discord is an application that was originally designed for gamers to get together to chat and discuss and just have a forum to be together to discuss gaming and/or any other topics they are interested in. This crowd was also heavily into crypto and NFTs, so this became the standard forum for NFT projects to gain awareness and gather communities together. So, creating a discord server for your NFT community is probably going to be your top prioritity for your marketing campaign. But, I'm sorry to say that creating a discord server is outside the scope of this tutorial. There are many many tutorials and walkthroughs on how to manage (moderate) your discord server, so I really won't go into it much here. A discord "server" is really just the name given to your discord area..like a chatroom...but it can contain many many rooms...so more like a chat "building". I have created a discord server template that you are free to use as you wish. This will allow you to create a discord server that has all the standard "channels" (invididual rooms where a certain subject regarding your project is discussed) and "roles" (permission levels for the members of your server). The server template is accessed by clicking this link https://discord.new/XKGfj6vWf2QD when you are logged into your discord account that you want to be the "crown" account for the discord server. What is a discord "crown account" you say? Well, this is a very important topic for discord safety. When you create a discord server, the account you are logged into discord as will be considered the "crown account" for the server. It is the server owner. It is a special account because that account can NEVER be banned or kicked out of the server. Why is this important? Well, if you aren't very experienced with discord, then you will soon learn that discord is full of scammers, and gaining administrative access to your account or your server is a prime target for scammers. So, as a project owner, you will be constantly under attack as people try to gain access to your discord server or account. So, you should create a special discord account that will be used to create the discord server. This account will become the server owner (aka "crown account"). Set up this special discord account using your "business" email as we have been discussion throughout this tutorial. Then, you never really log into this "crown" discord account, but have a second "personal" or even "supervisor" type account that you log in as when you are doing your daily business in the server. This "supervisor" type account you will give adminstrative permissions, so it can do everything you need to do in your discord server. If you ever get hacked when you are using your "supervisor" account, the hacker will usually start making changes to your discord server and will start to scam your community. You can then go quickly log into discord as the "crown" account and you can kick your "supervisor" account out of the server, which will kick out the hacker. But, if you were logged in as the "crown" account when you got hacked, you can never kick that person out...they hacked the "crown" account so they can never be removed and can mess with your community forever. So, creating the "crown" account to set up the discord server, and then never logging into that account unless it is an emergency allows you to have the ability to save your server if someone hacks your account. If they hack your "crown" account, there is not much you can do...so it is important to only ever be logged in as that "crown" account in an emergency. For now, create a new discord "crown" account, then use the server template I gave you above and create a discord server. Then create a second "supervisor" account (or just use your personal discord account) and join the server. Then go back to the "crown" account and set your "supervisor" or personal account as an administrator. Then log out of the "crown" account and log back in as your supervisor and from then on, you can do whatever you need to do to set up your discord and you always have that fallback plan of jumping in as the "crown" account in an emergency.
Marketing Plan
Then we needed to get people talking about our project so my dad said we should use discord and twitter for that. You need to get people talking about your project if you want people to know it exists. Basically we just had to join a lot of communities and talk to them about our idea so that they would talk about our project to their members.
Coming up with a plan to market your NFT is another item that is too big for this tutorial, but I will give you some basic ideas you can try when developing your plan. Currently, the most popular way to market your NFT is using twitter and discord. In twitter, you make tweets describing your project. Or make tweets to run giveaways for your project. Maybe a free mint or something. When you dive into discord, you will find many different projects, and when you go to the twitter account for those projects, you will see the most common ways to get followers and get people talking about or looking at your project. Search twitter for hashtags like #nft #raffle #giveaway, or search twitter for users with NFT in their name. You will start to see lots of accounts and see lots of giveways out there. You should join some discord servers also and just hang out and see how projects network with each other (called a collab or a collateration) to get people to see their project. You also will need to do some AMA (ask me anything) sessions to get people to hear about your project and to ask you questions. Hang out in discords and join AMA sessions in discord or in twitter spaces to see how these are run. Hang out in lots and lots of discord "alpha" servers to get a feel for why people talk about certain projects, or what makes people interested in projects. "Alpha" servers are just places where people talk about the "next big thing". They talk about upcoming projects, or projects they think will be popular or worth money, or whatever. The best way to learn how to do this right is to just dive in and surround yourself in it. You don't need to buy any NFTs to get a feel for how things work, just hang out and watch people. Maybe ask questions, maybe not...the important thing is to just be in it for a few days or better, a few weeks....see how things become popular, and more importantly, how things become failures. Misrepresenting yourself or your project, or overpromising are definate ways to fail. Being rude or not caring for your community are other ways to fail. Or even not testing your code and releasing it when it doesn't work right is a sure fire way to fail. Just hang out and see why some things succeed, and see why others fail. Knowing why projects fail is a top priority...you can always slowly gain momentum and succeed...but a failure is often irreversible, so you want to try your hardest not to go down that road of failure. Failure can happen in a split second if you do the wrong thing.